1
Just finished this tamiya 1:48 spitfire! It’s such a lovely kit with brilliant fit. I can’t use an airbrush so had some issues with paint texture but I’m happy with the outcome and had fun building it :)


WIP community dedicated to the hobby of plastic model kit building and painting.
Gunpla, Warhammer, RPG minis, model cars/planes/trains, all is welcome!
Share your latest builds/WIPs and discuss the art of plastic model building!
Rules
-Be kind!
-Credit the builder
Just finished this tamiya 1:48 spitfire! It’s such a lovely kit with brilliant fit. I can’t use an airbrush so had some issues with paint texture but I’m happy with the outcome and had fun building it :)
I think this kit came out fairly nicely. I mucked up my varnish though :( The kit itself was pretty poor quality. There was some really bad fit and massive gaps in the kit. The wings needed some serious sanding before being able to fit into the fuselage

I think my best completion so far. The kit didn't end up perfect but I am glad a lot of the new things I've tried here have worked well like the lozenge decals and stipple pattern over the fuselage. Extra's are aviattic lozenge decals, taurus engine upgrades, master barrels, hgw belts and rexx exhaust. Rigging is gaspatch type c, glued on with eyelets made of 0.2mm copper wire and the wire itself is modelkasten.
Fuselage stipple was achieved with low air pressure on the compressor combined with a mac valve on my airbrush.
Any questions etc welcome (Yes the oil reservoir thingy broke I fixed it already!)


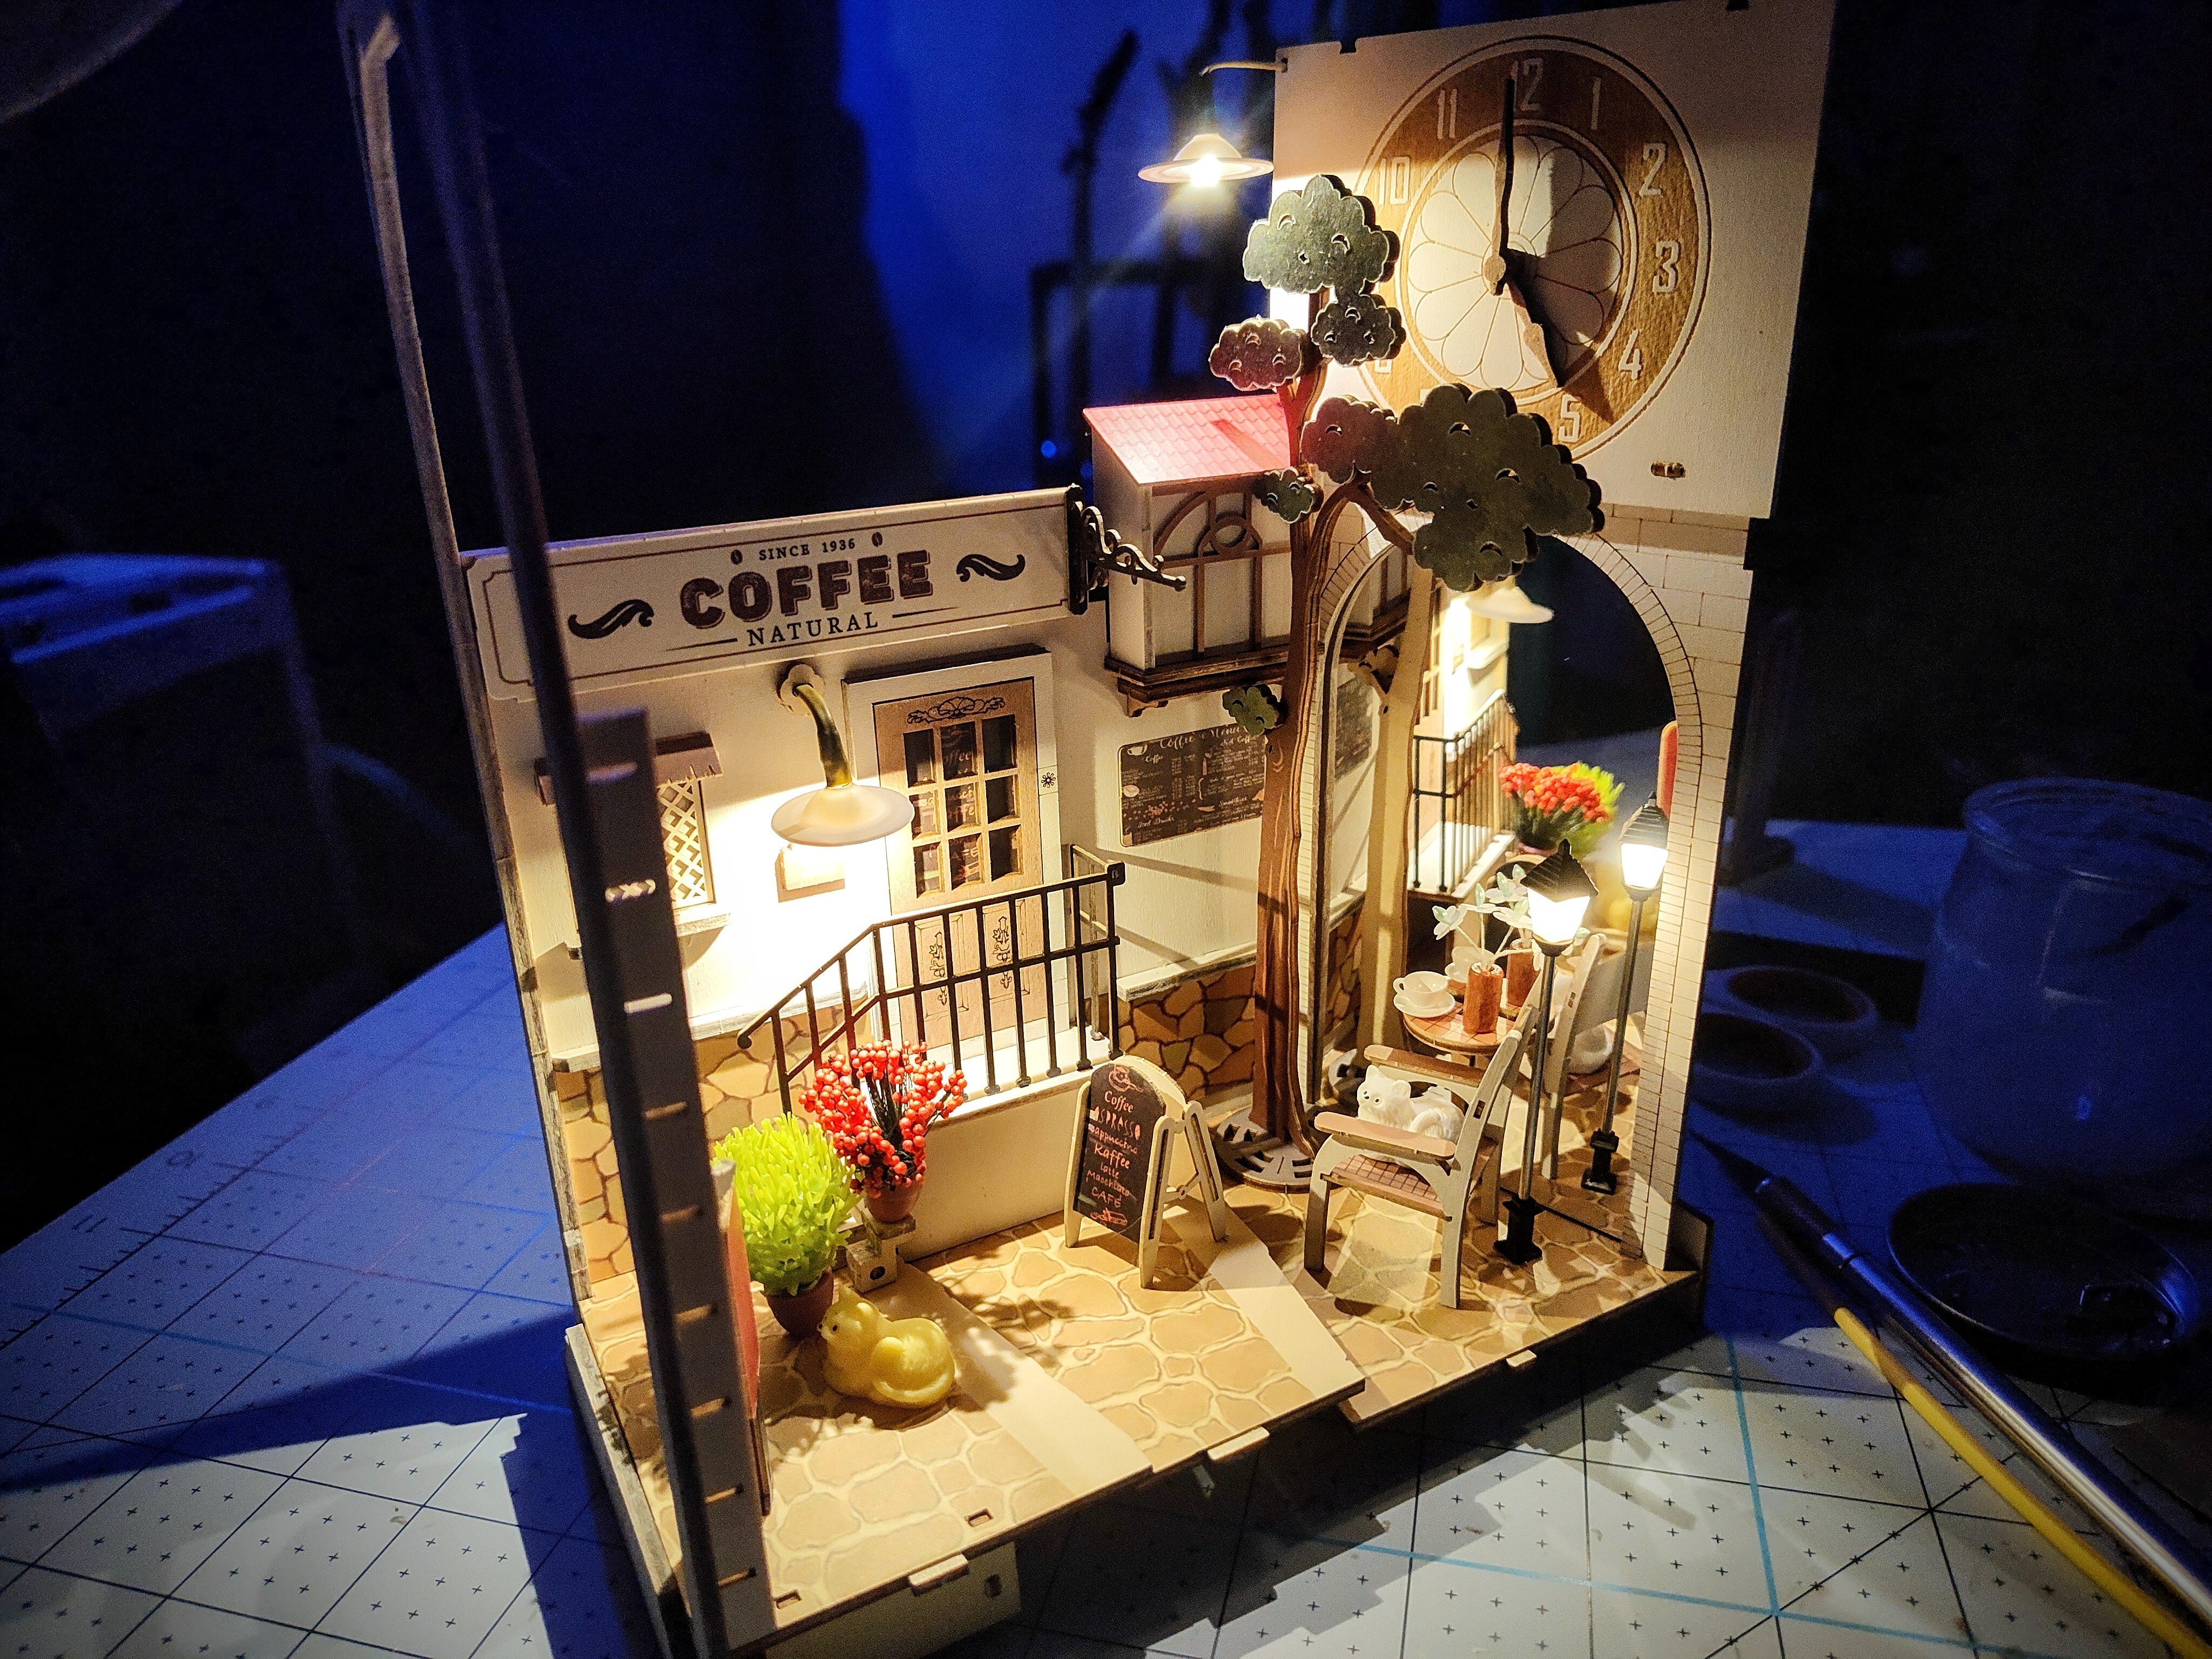
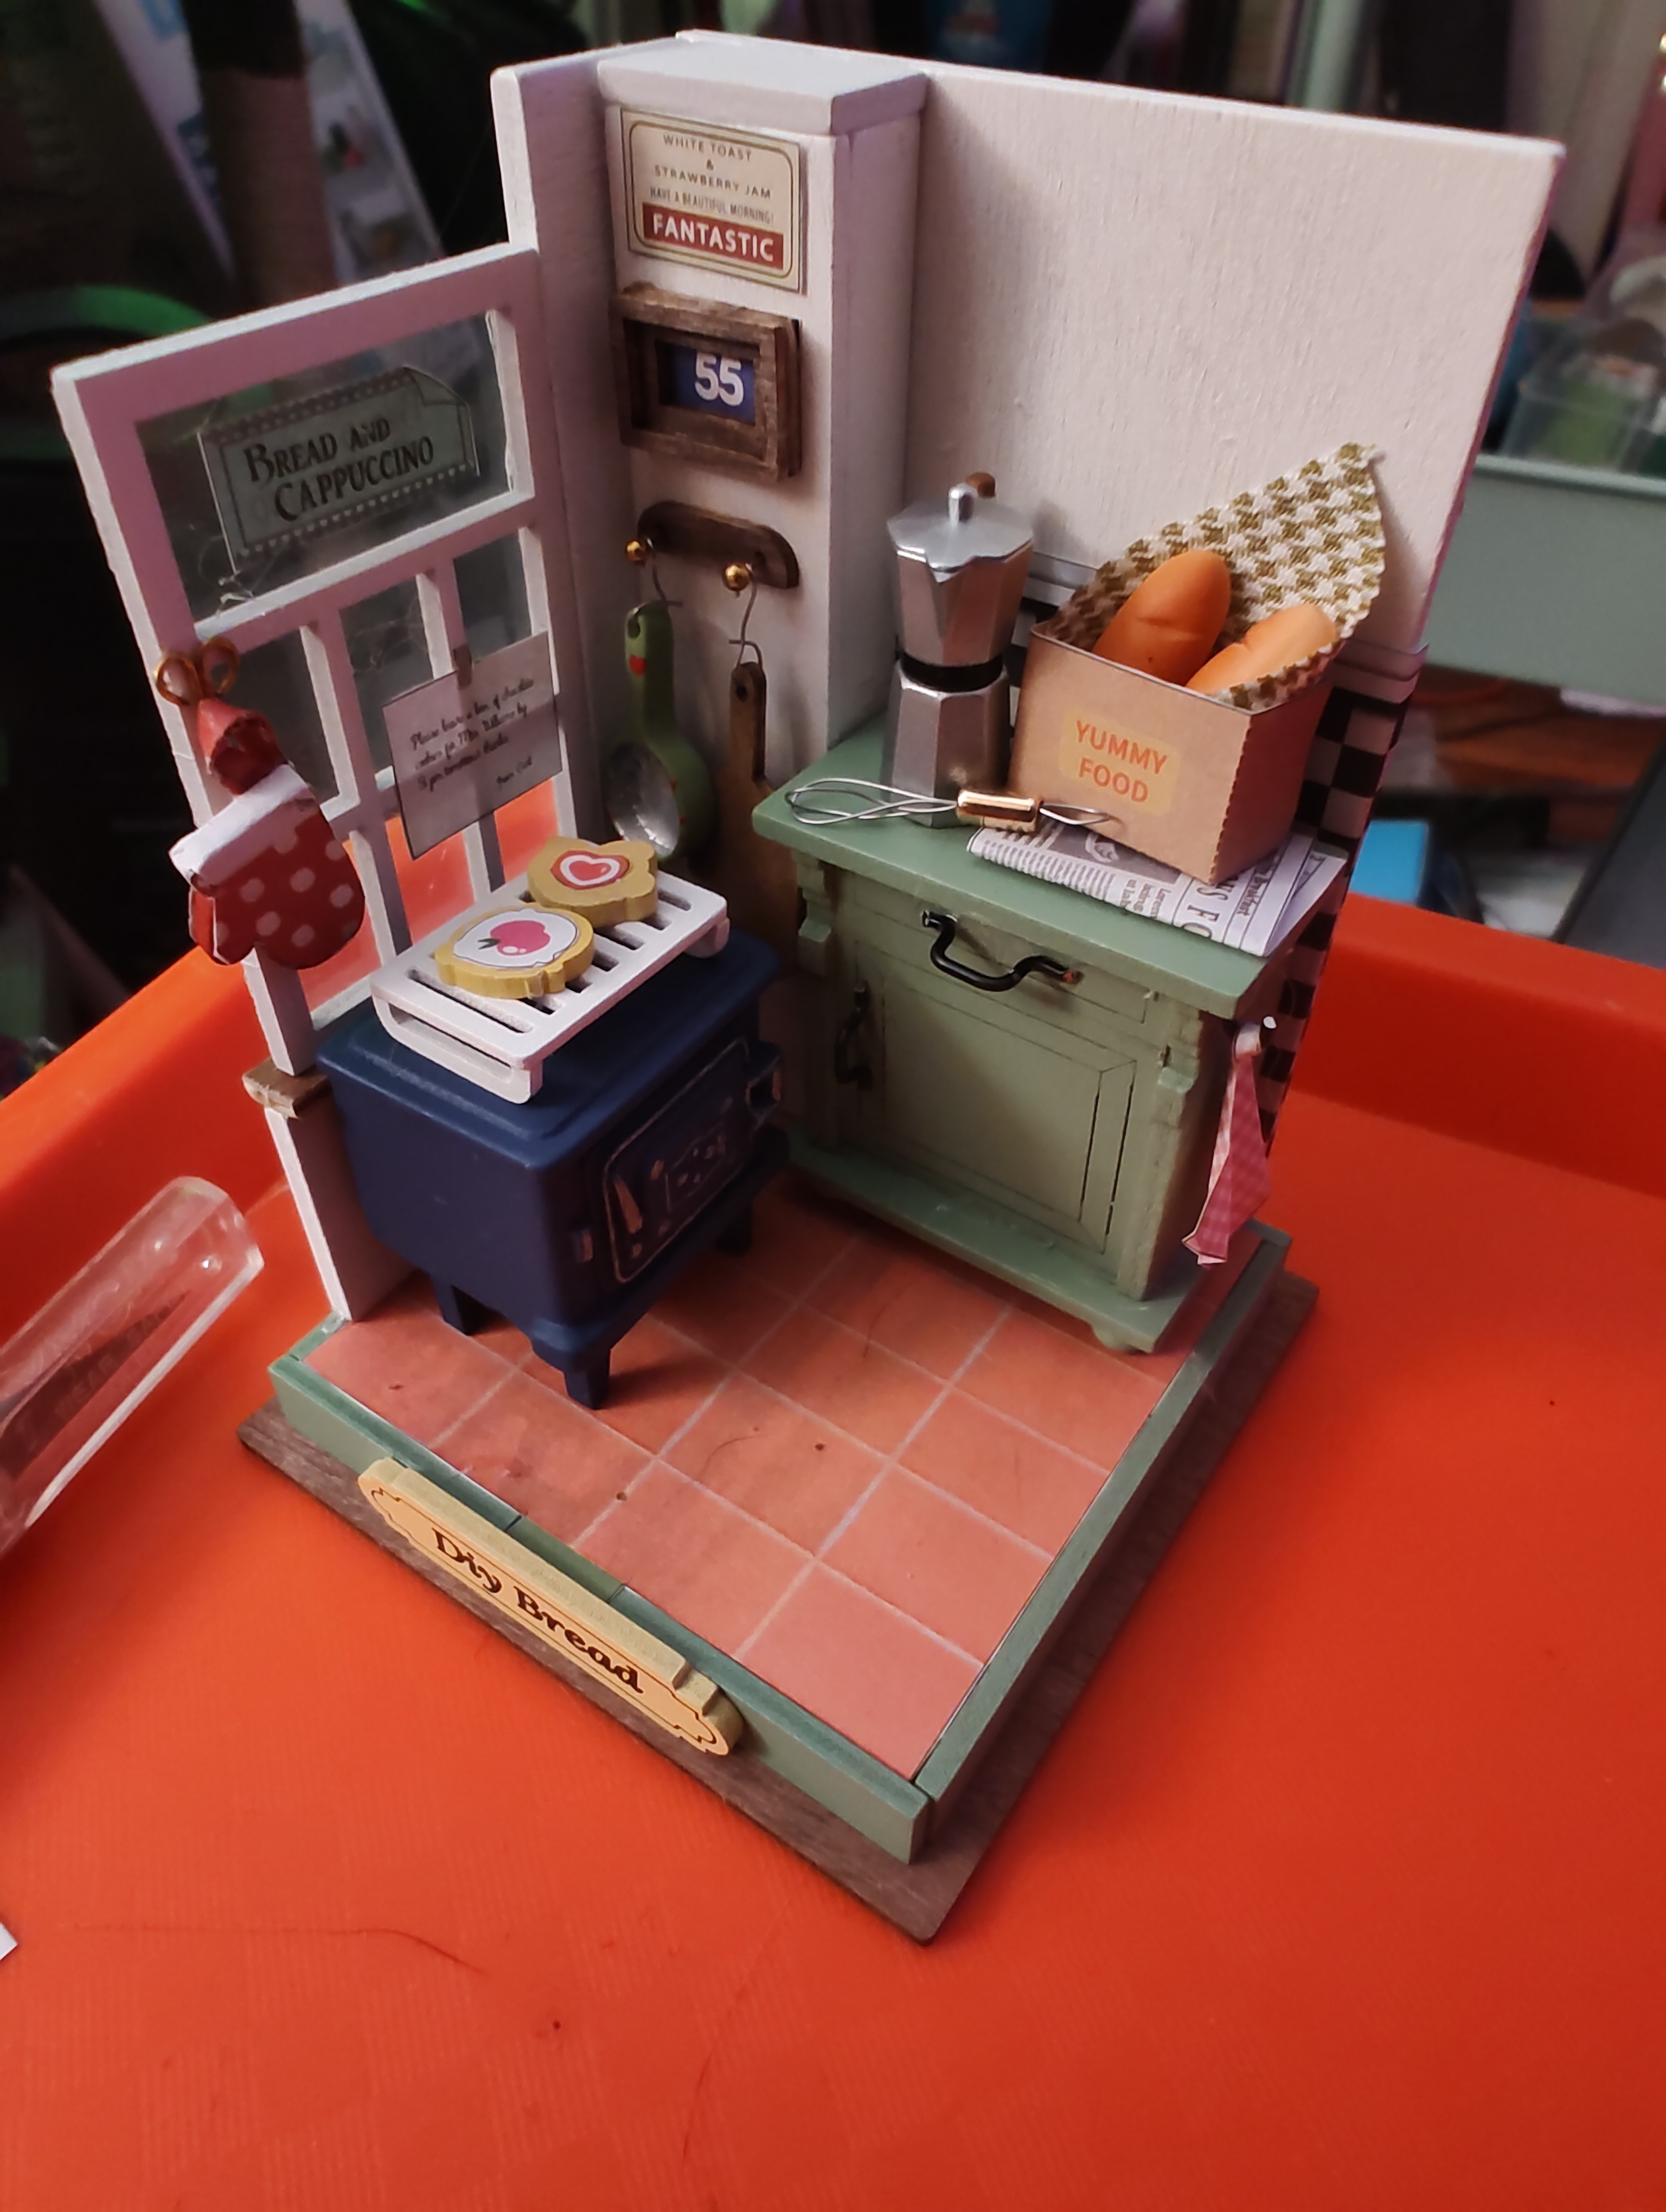
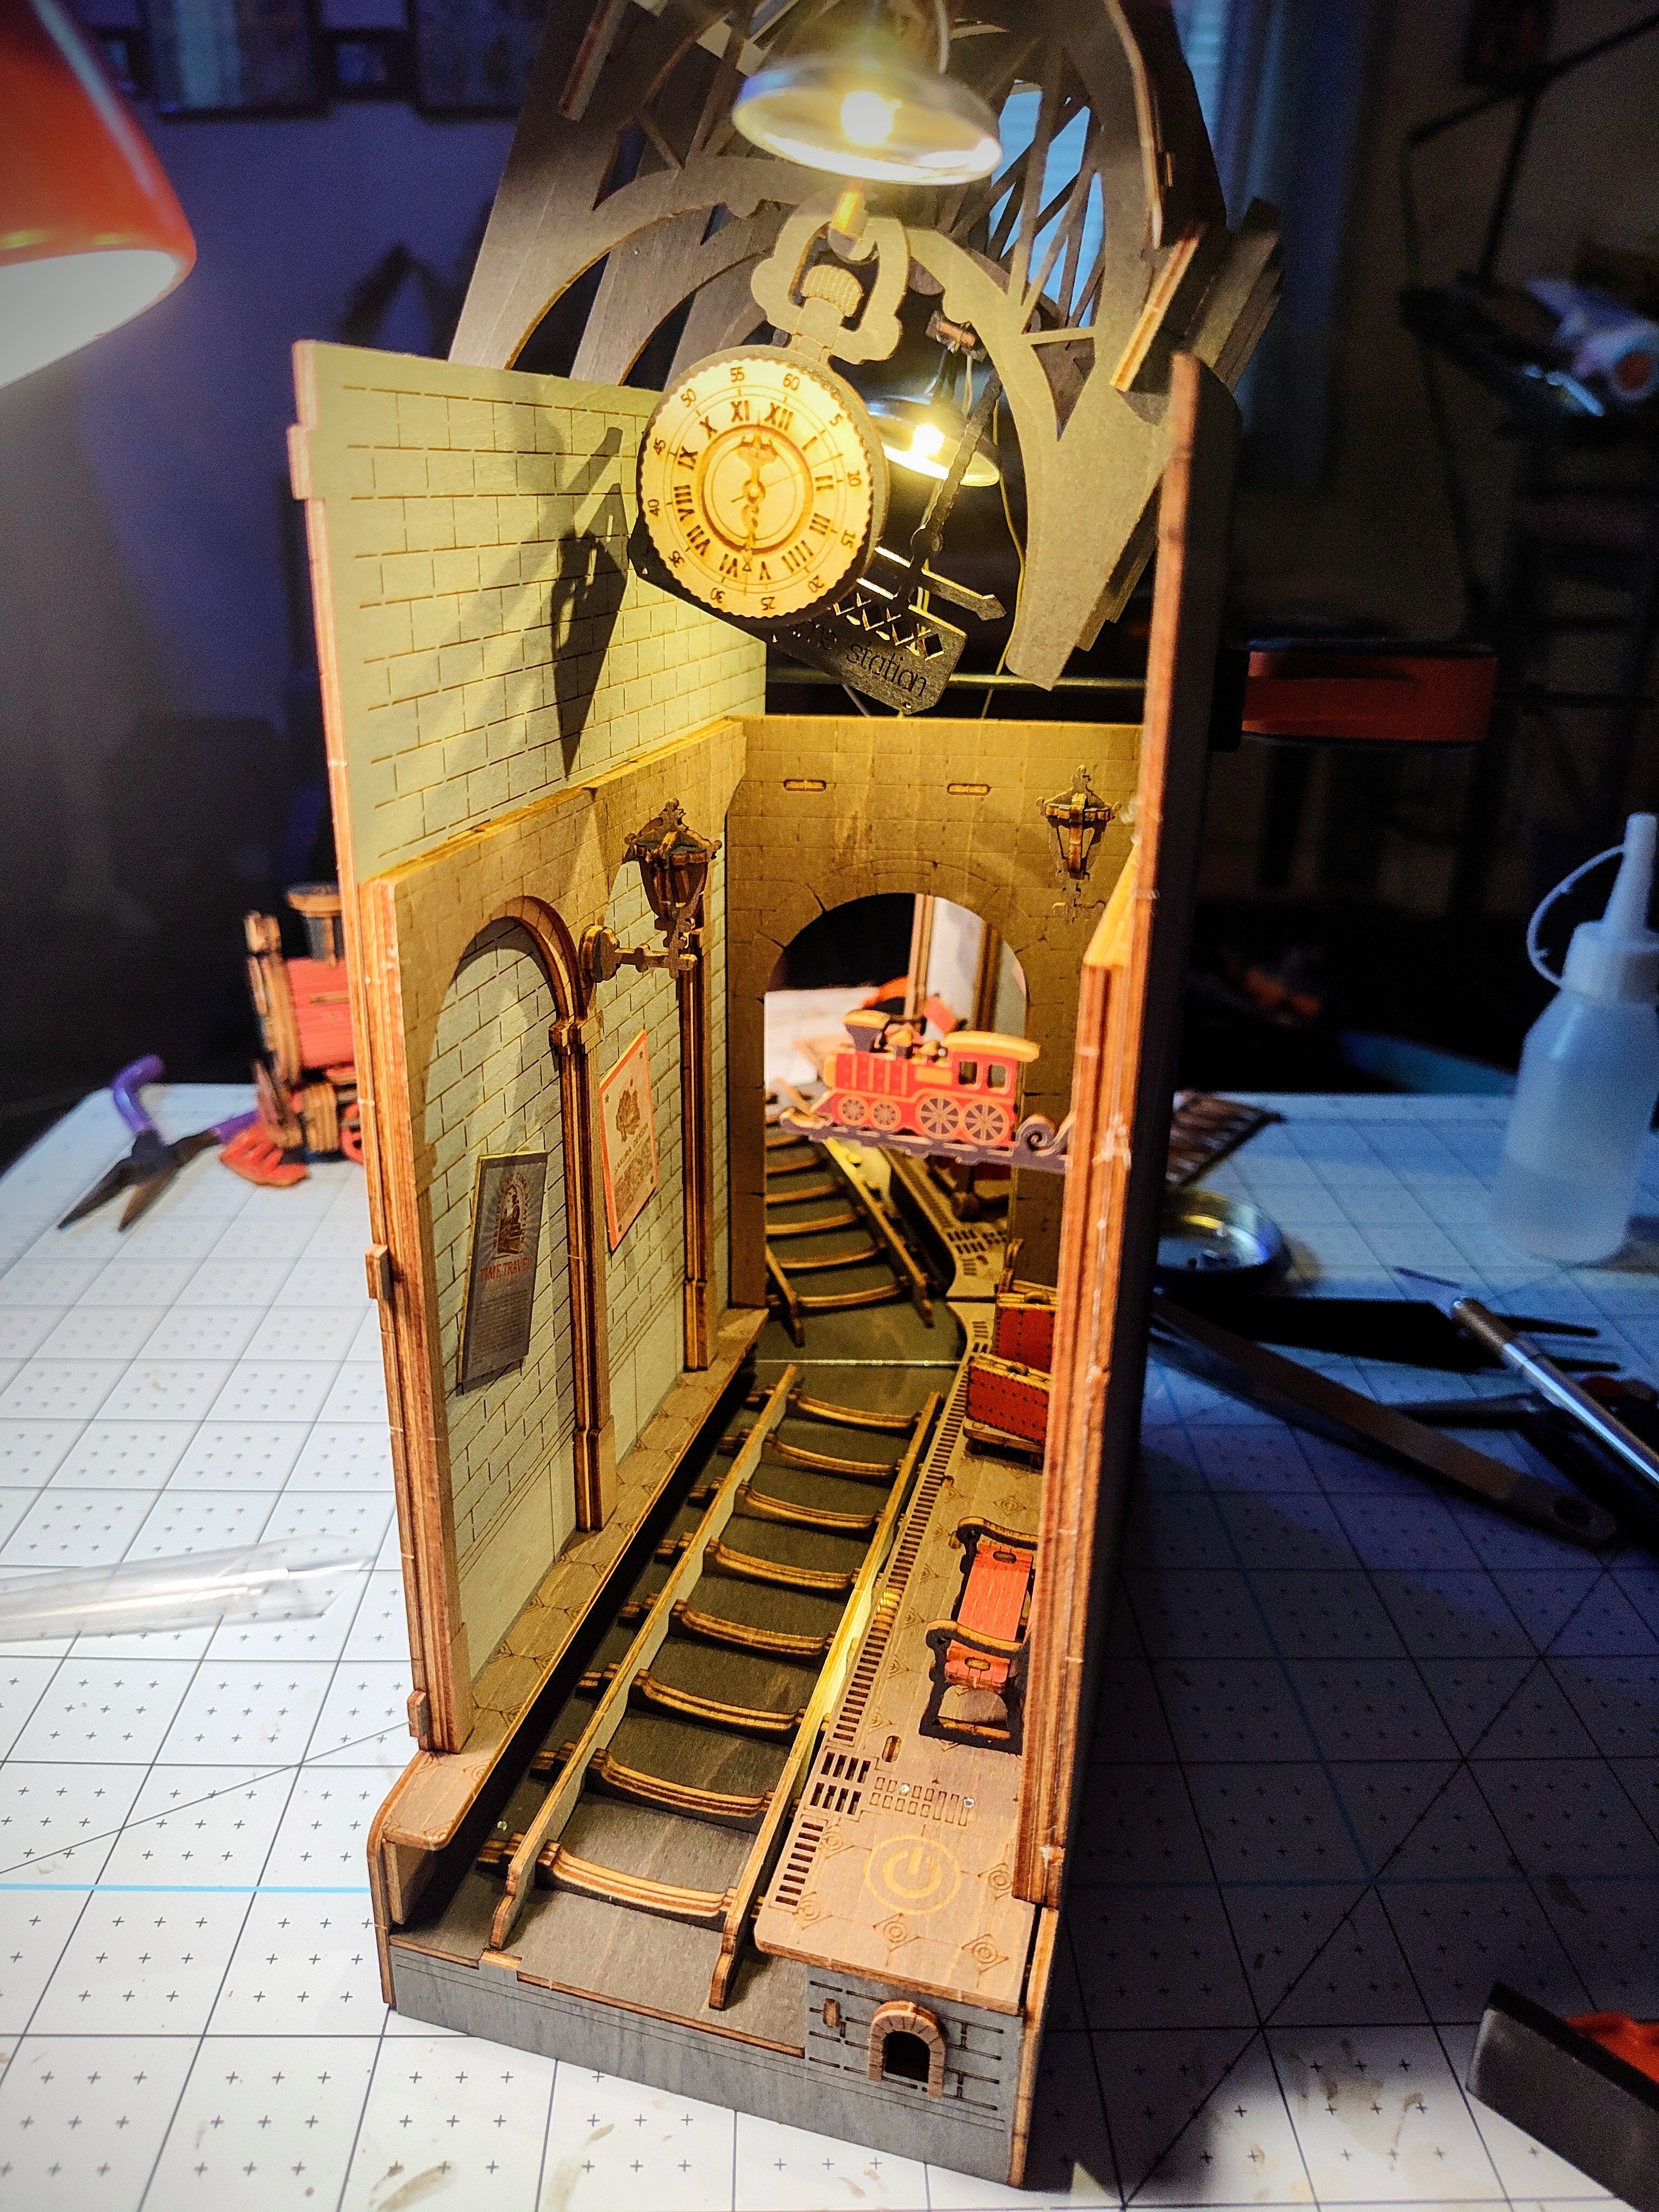
This one is not a Rolife "book nook" type model, it's more like a diorama. If you go through my post history the last one I finished was Kiki's Magic Shop. If anyone wants to try one of these, the diorama style ones are a lot more challenging than the book nooks.
With these you are basically given a handful of pre cut parts and a ton of raw materials to basically build everything yourself, including the wiring. Also the directions are VERY basic and often open to interpretation.
Having said that these are still a lot of fun to build and MUCH more customizable! I just wanted to point it out because these have a much higher level of difficulty compared to the other models I've posted recently!

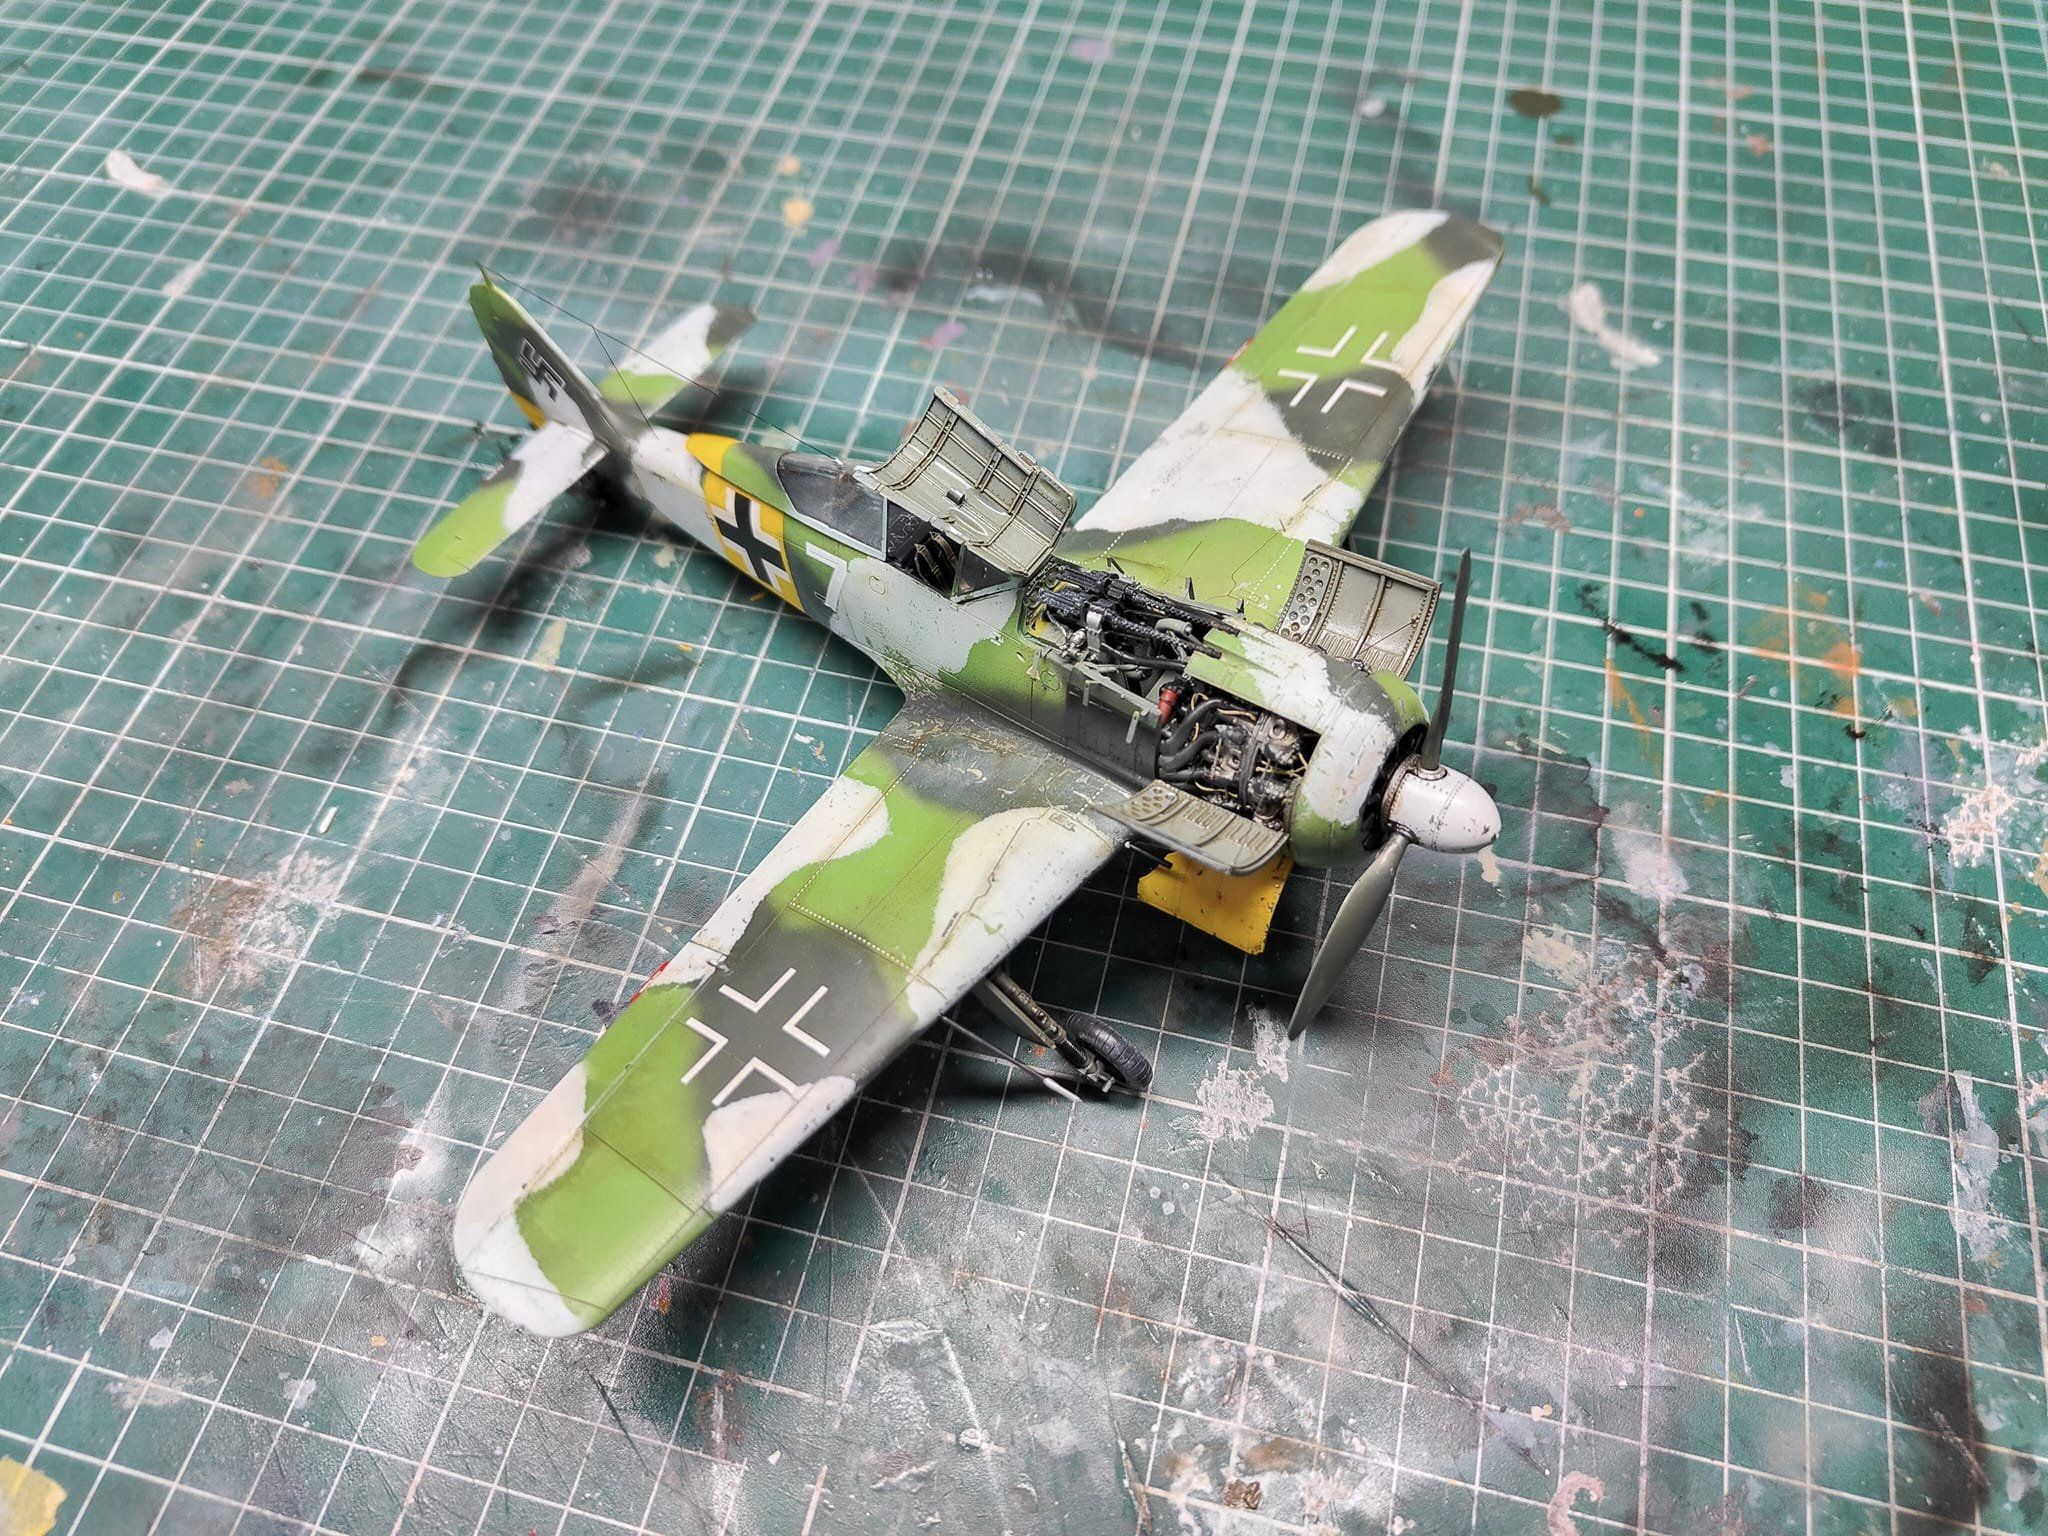
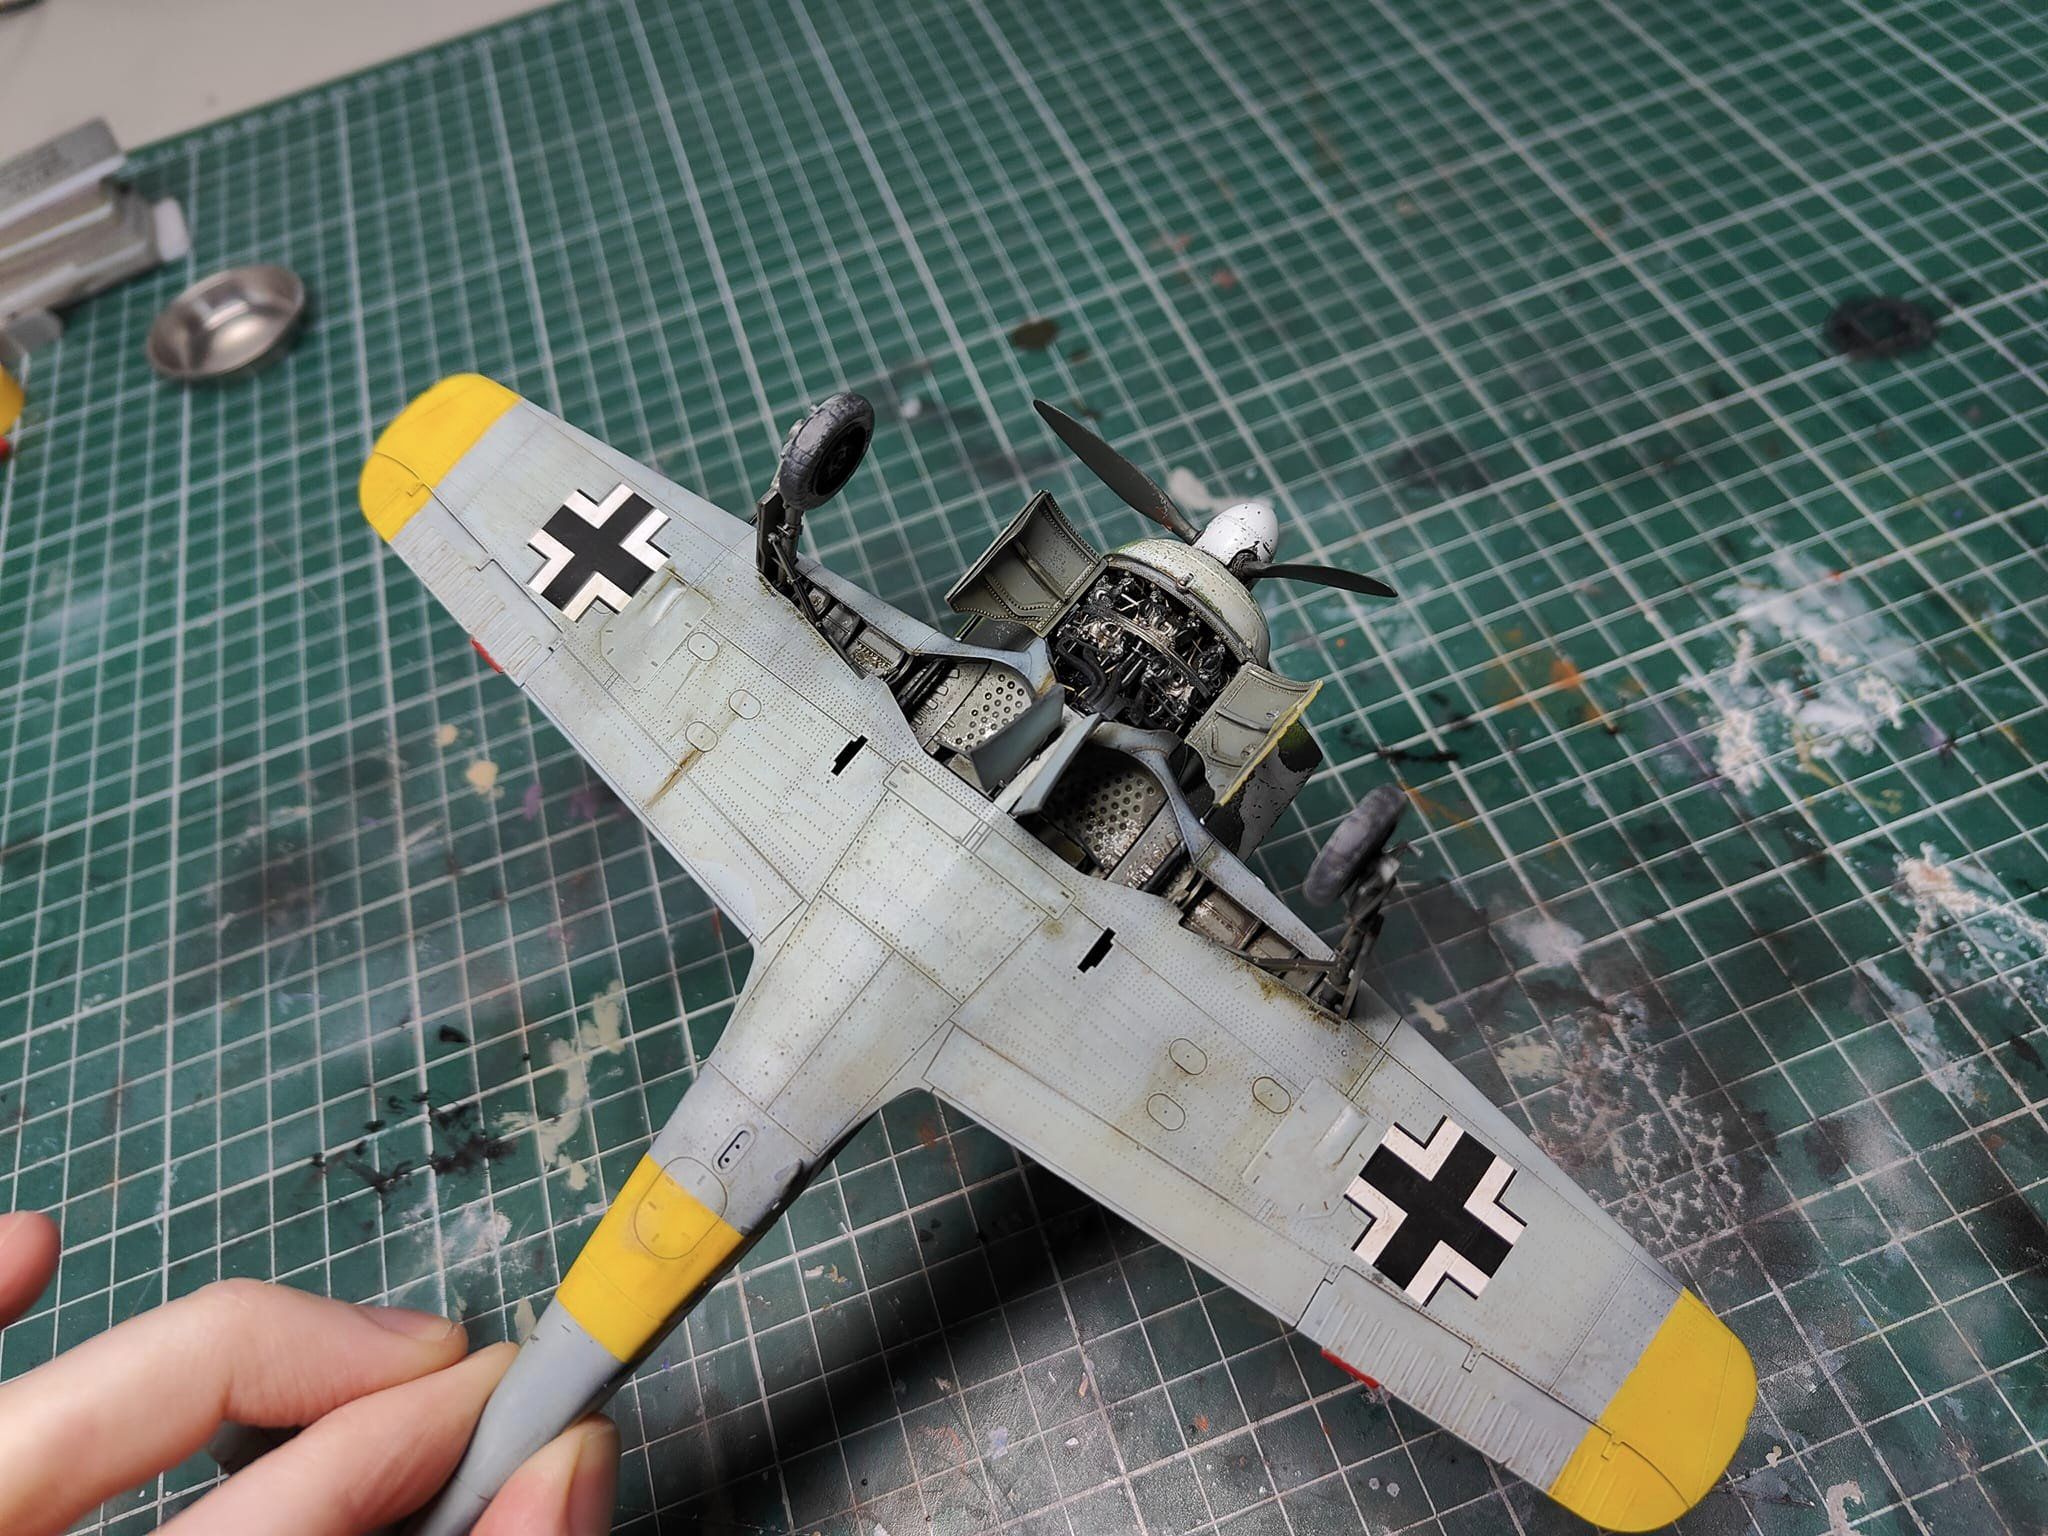
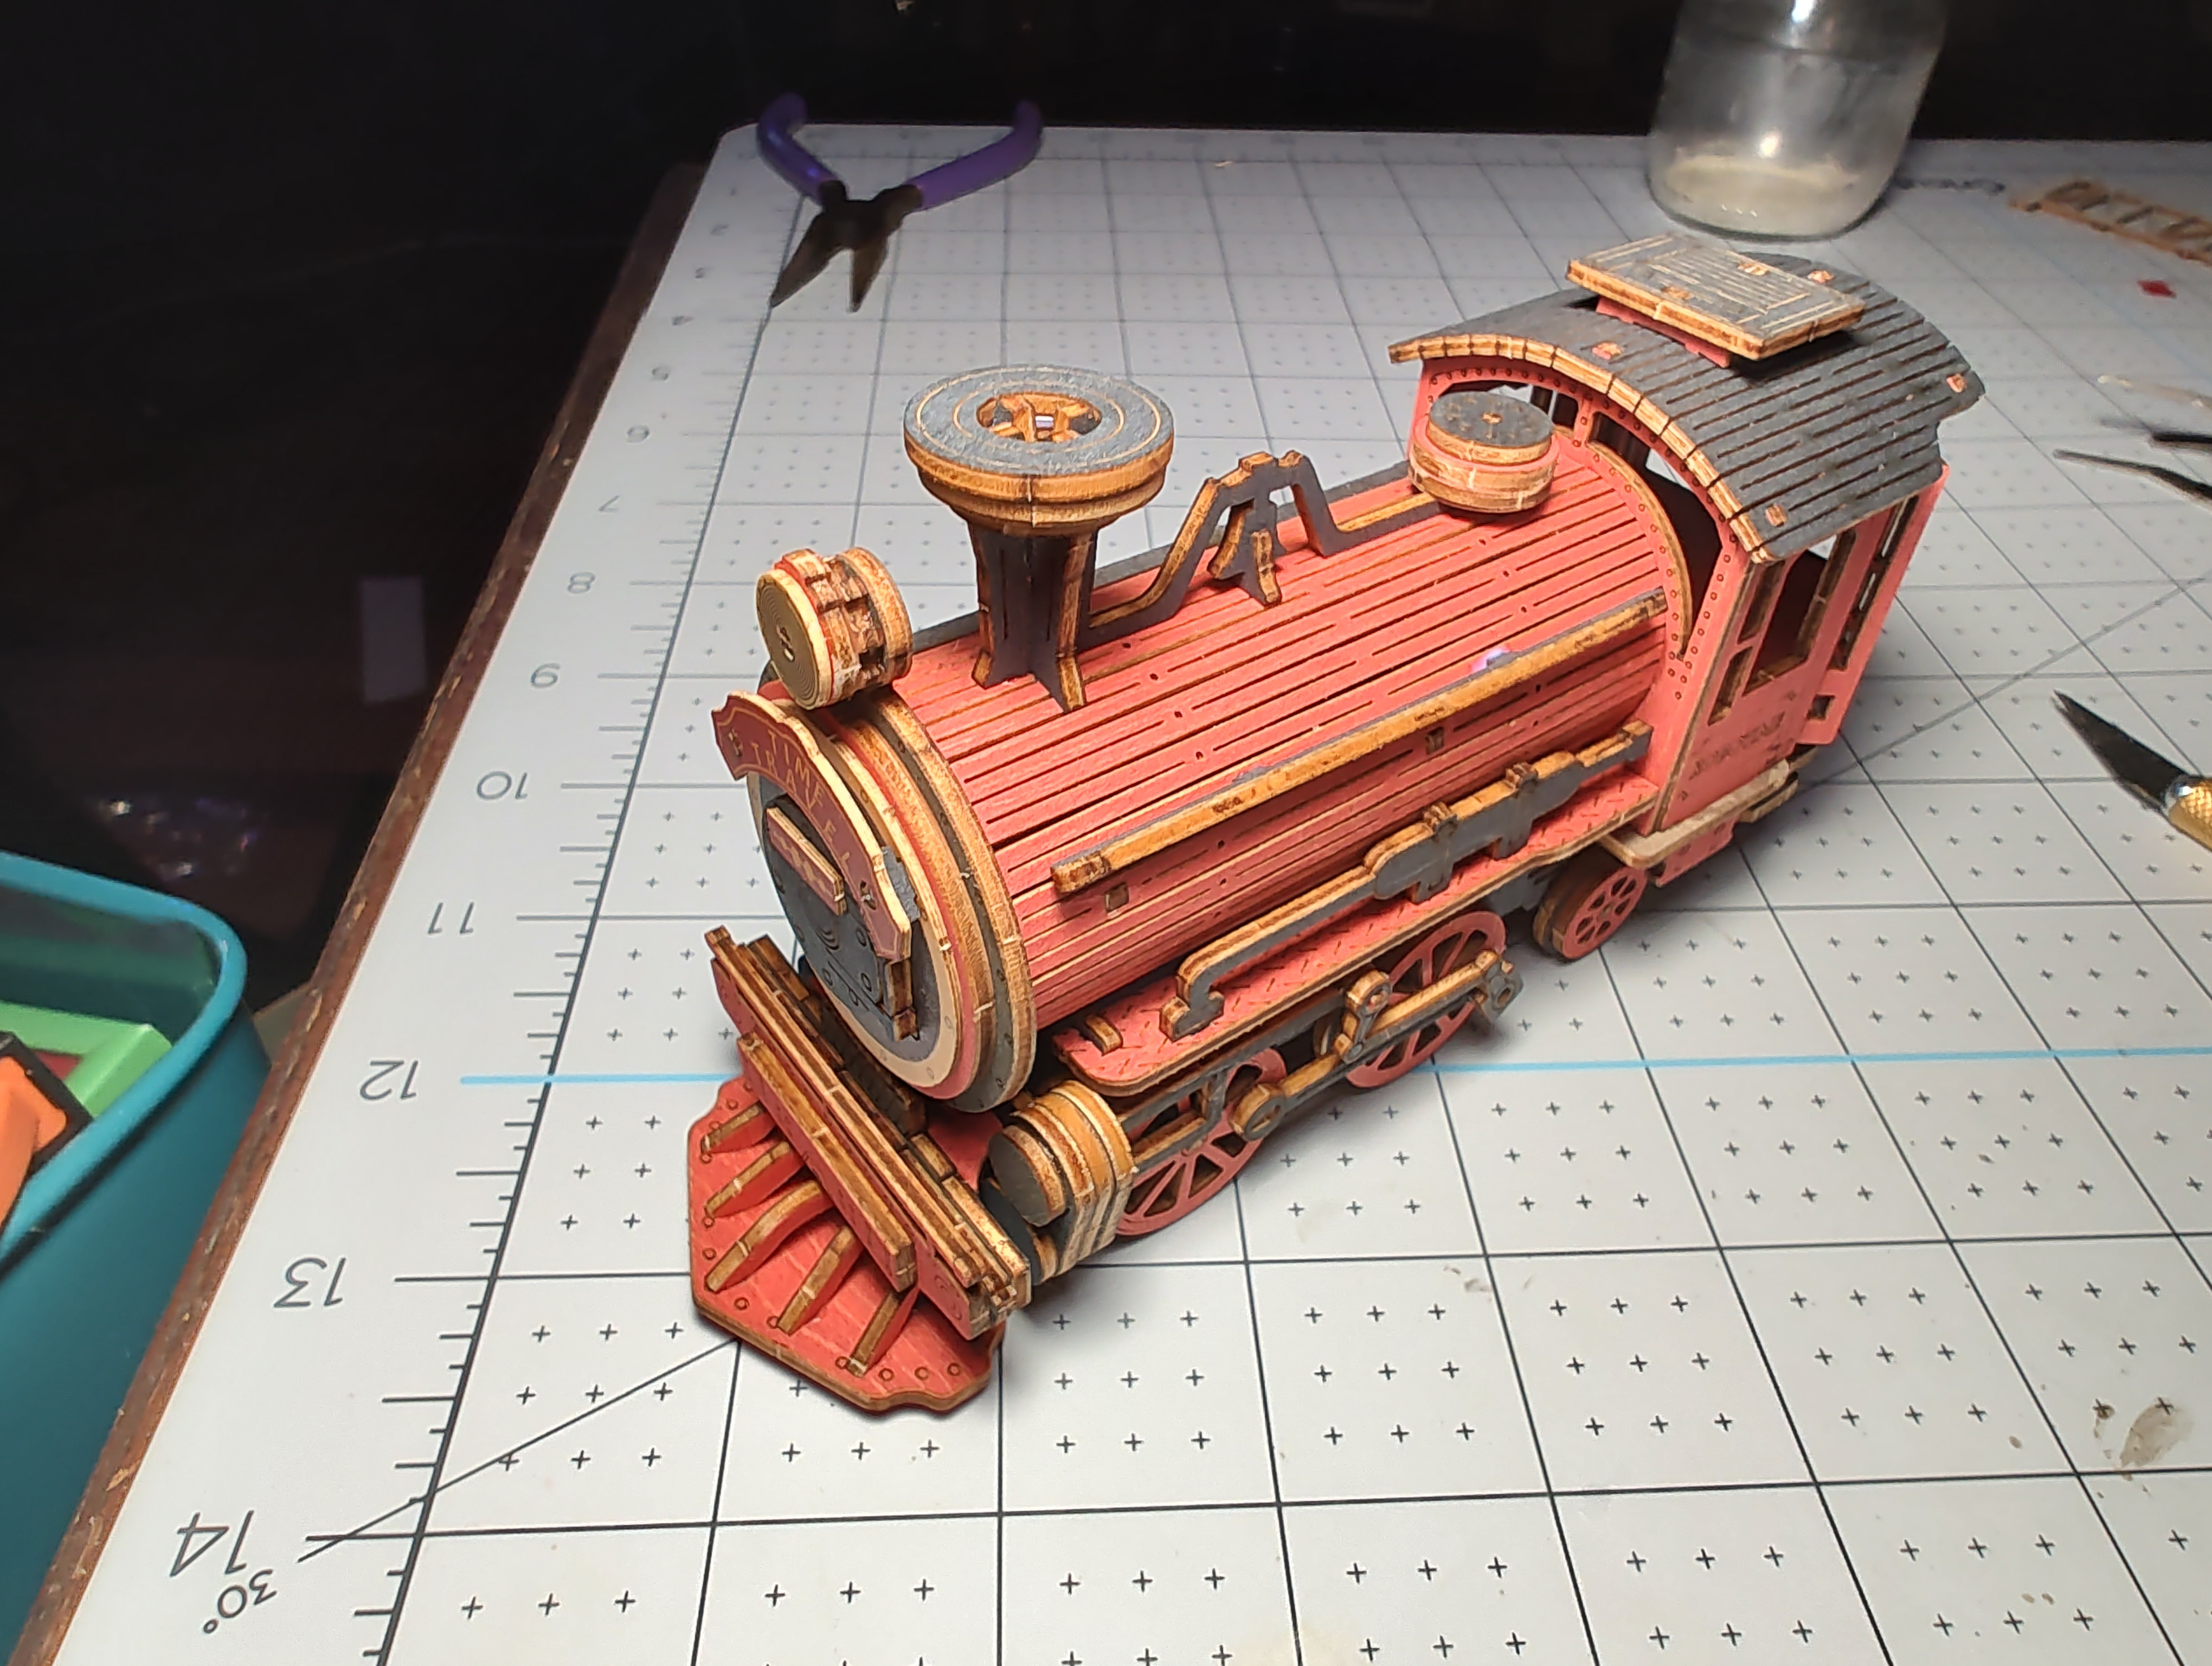
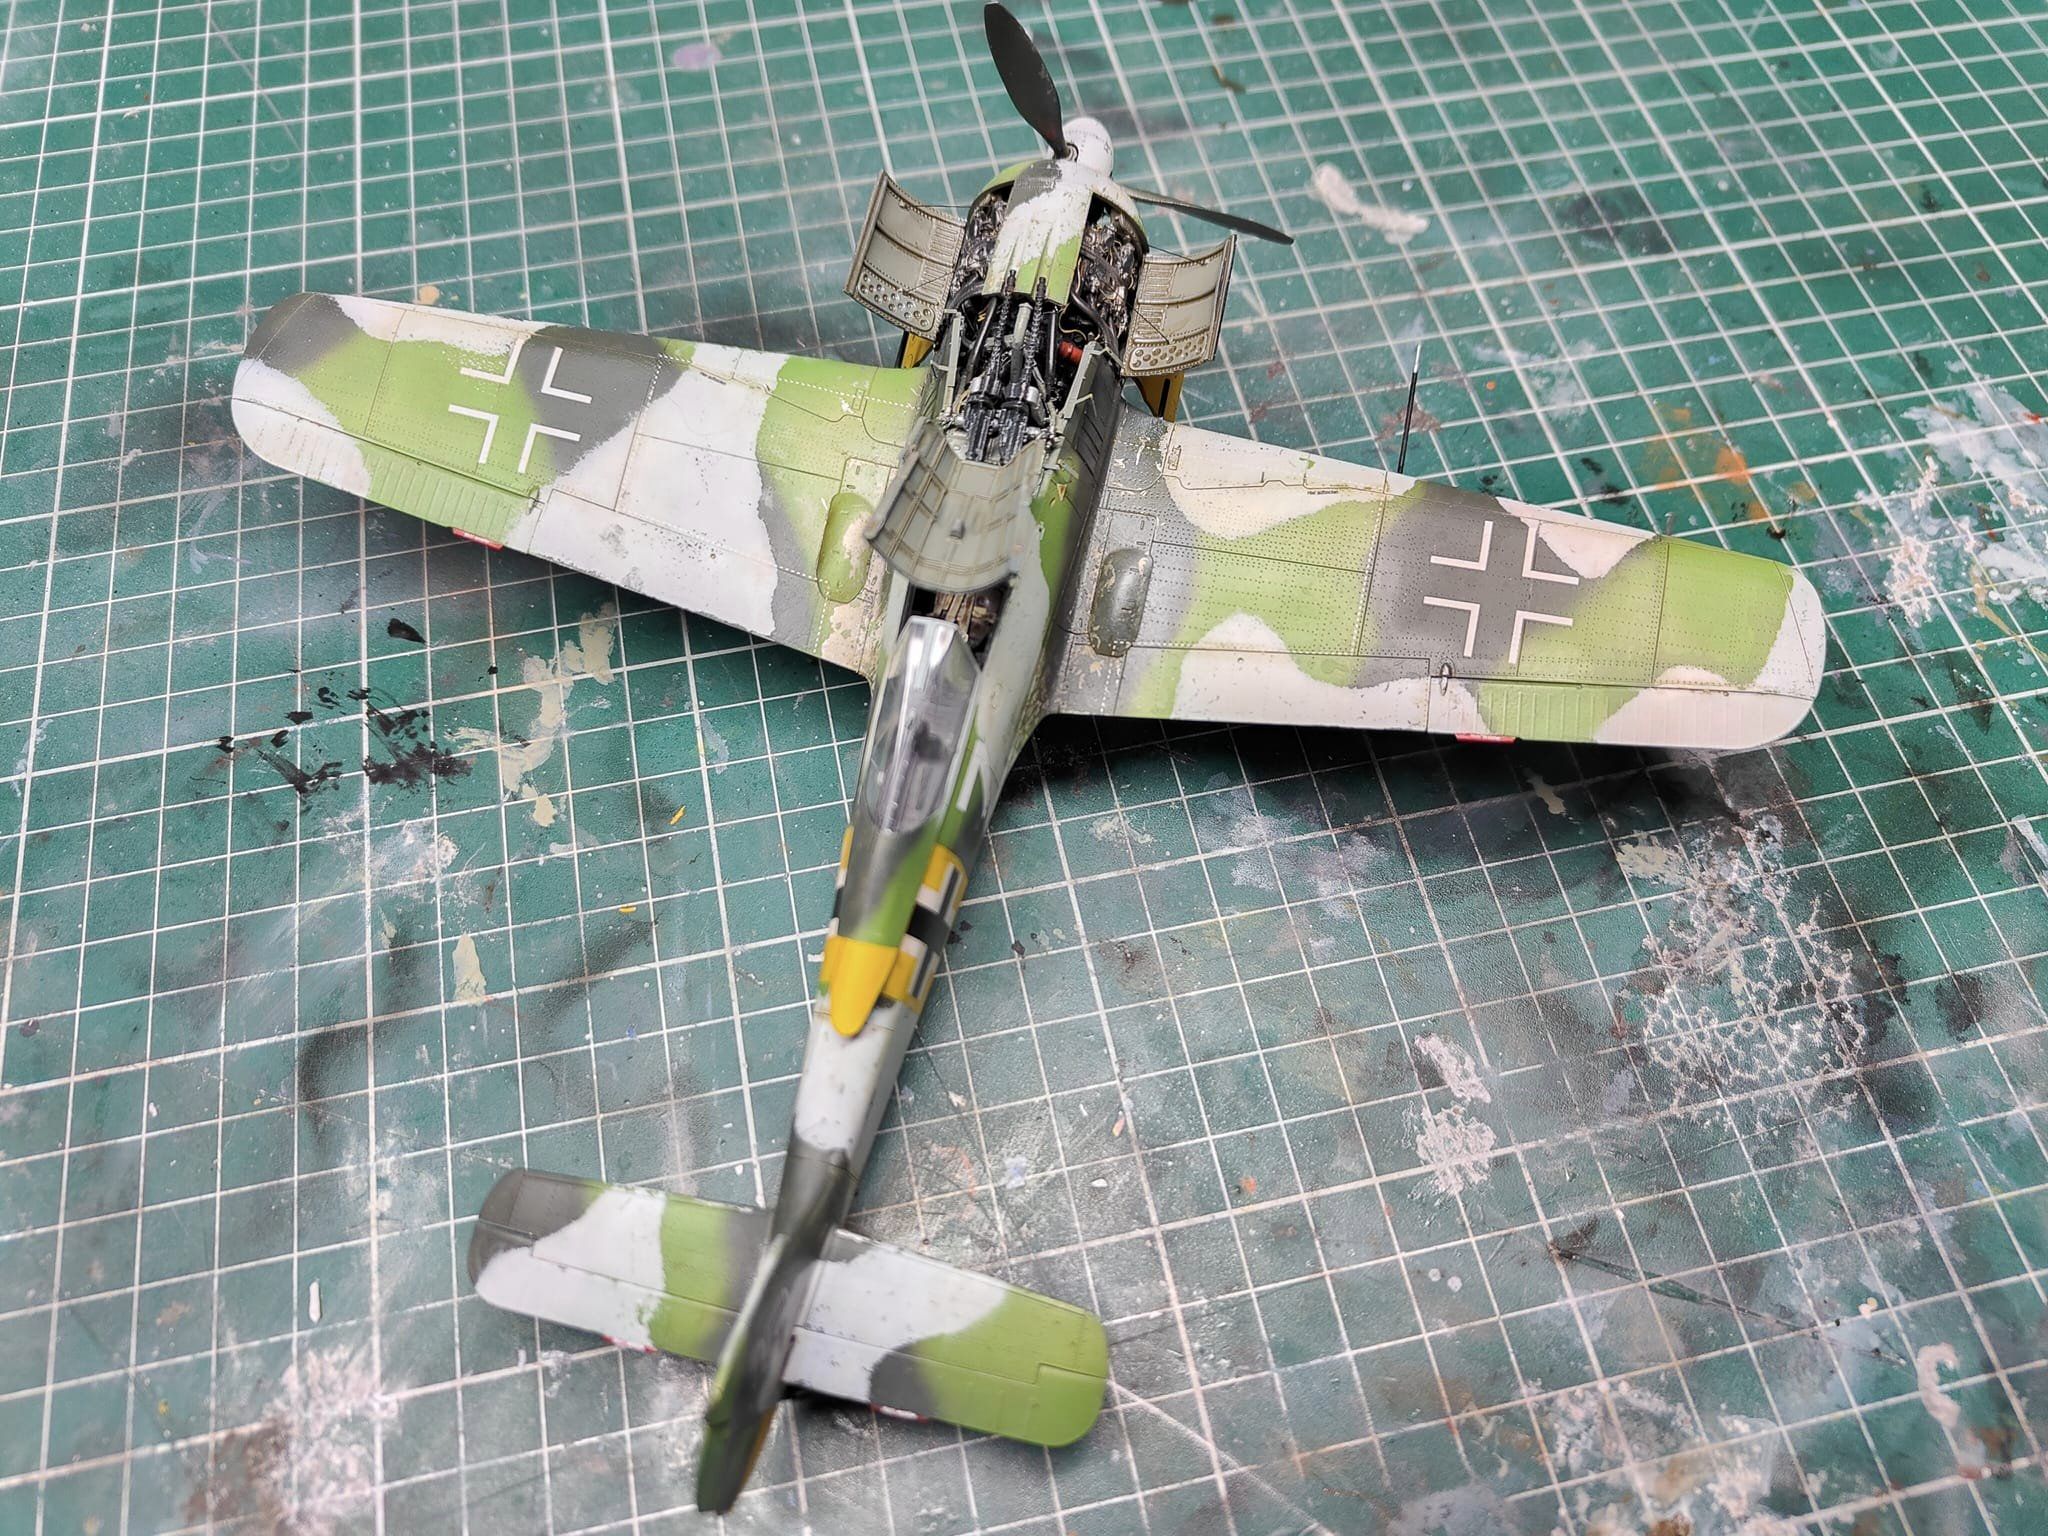
Completed in March this year. Extra's used are space3d for the cockpit, resin fuselage guns, engine, prop/spinner and wheels. Scheme from an eaglecals sheet.
This one is taking a little while to come together but it's finally starting to look like something lol

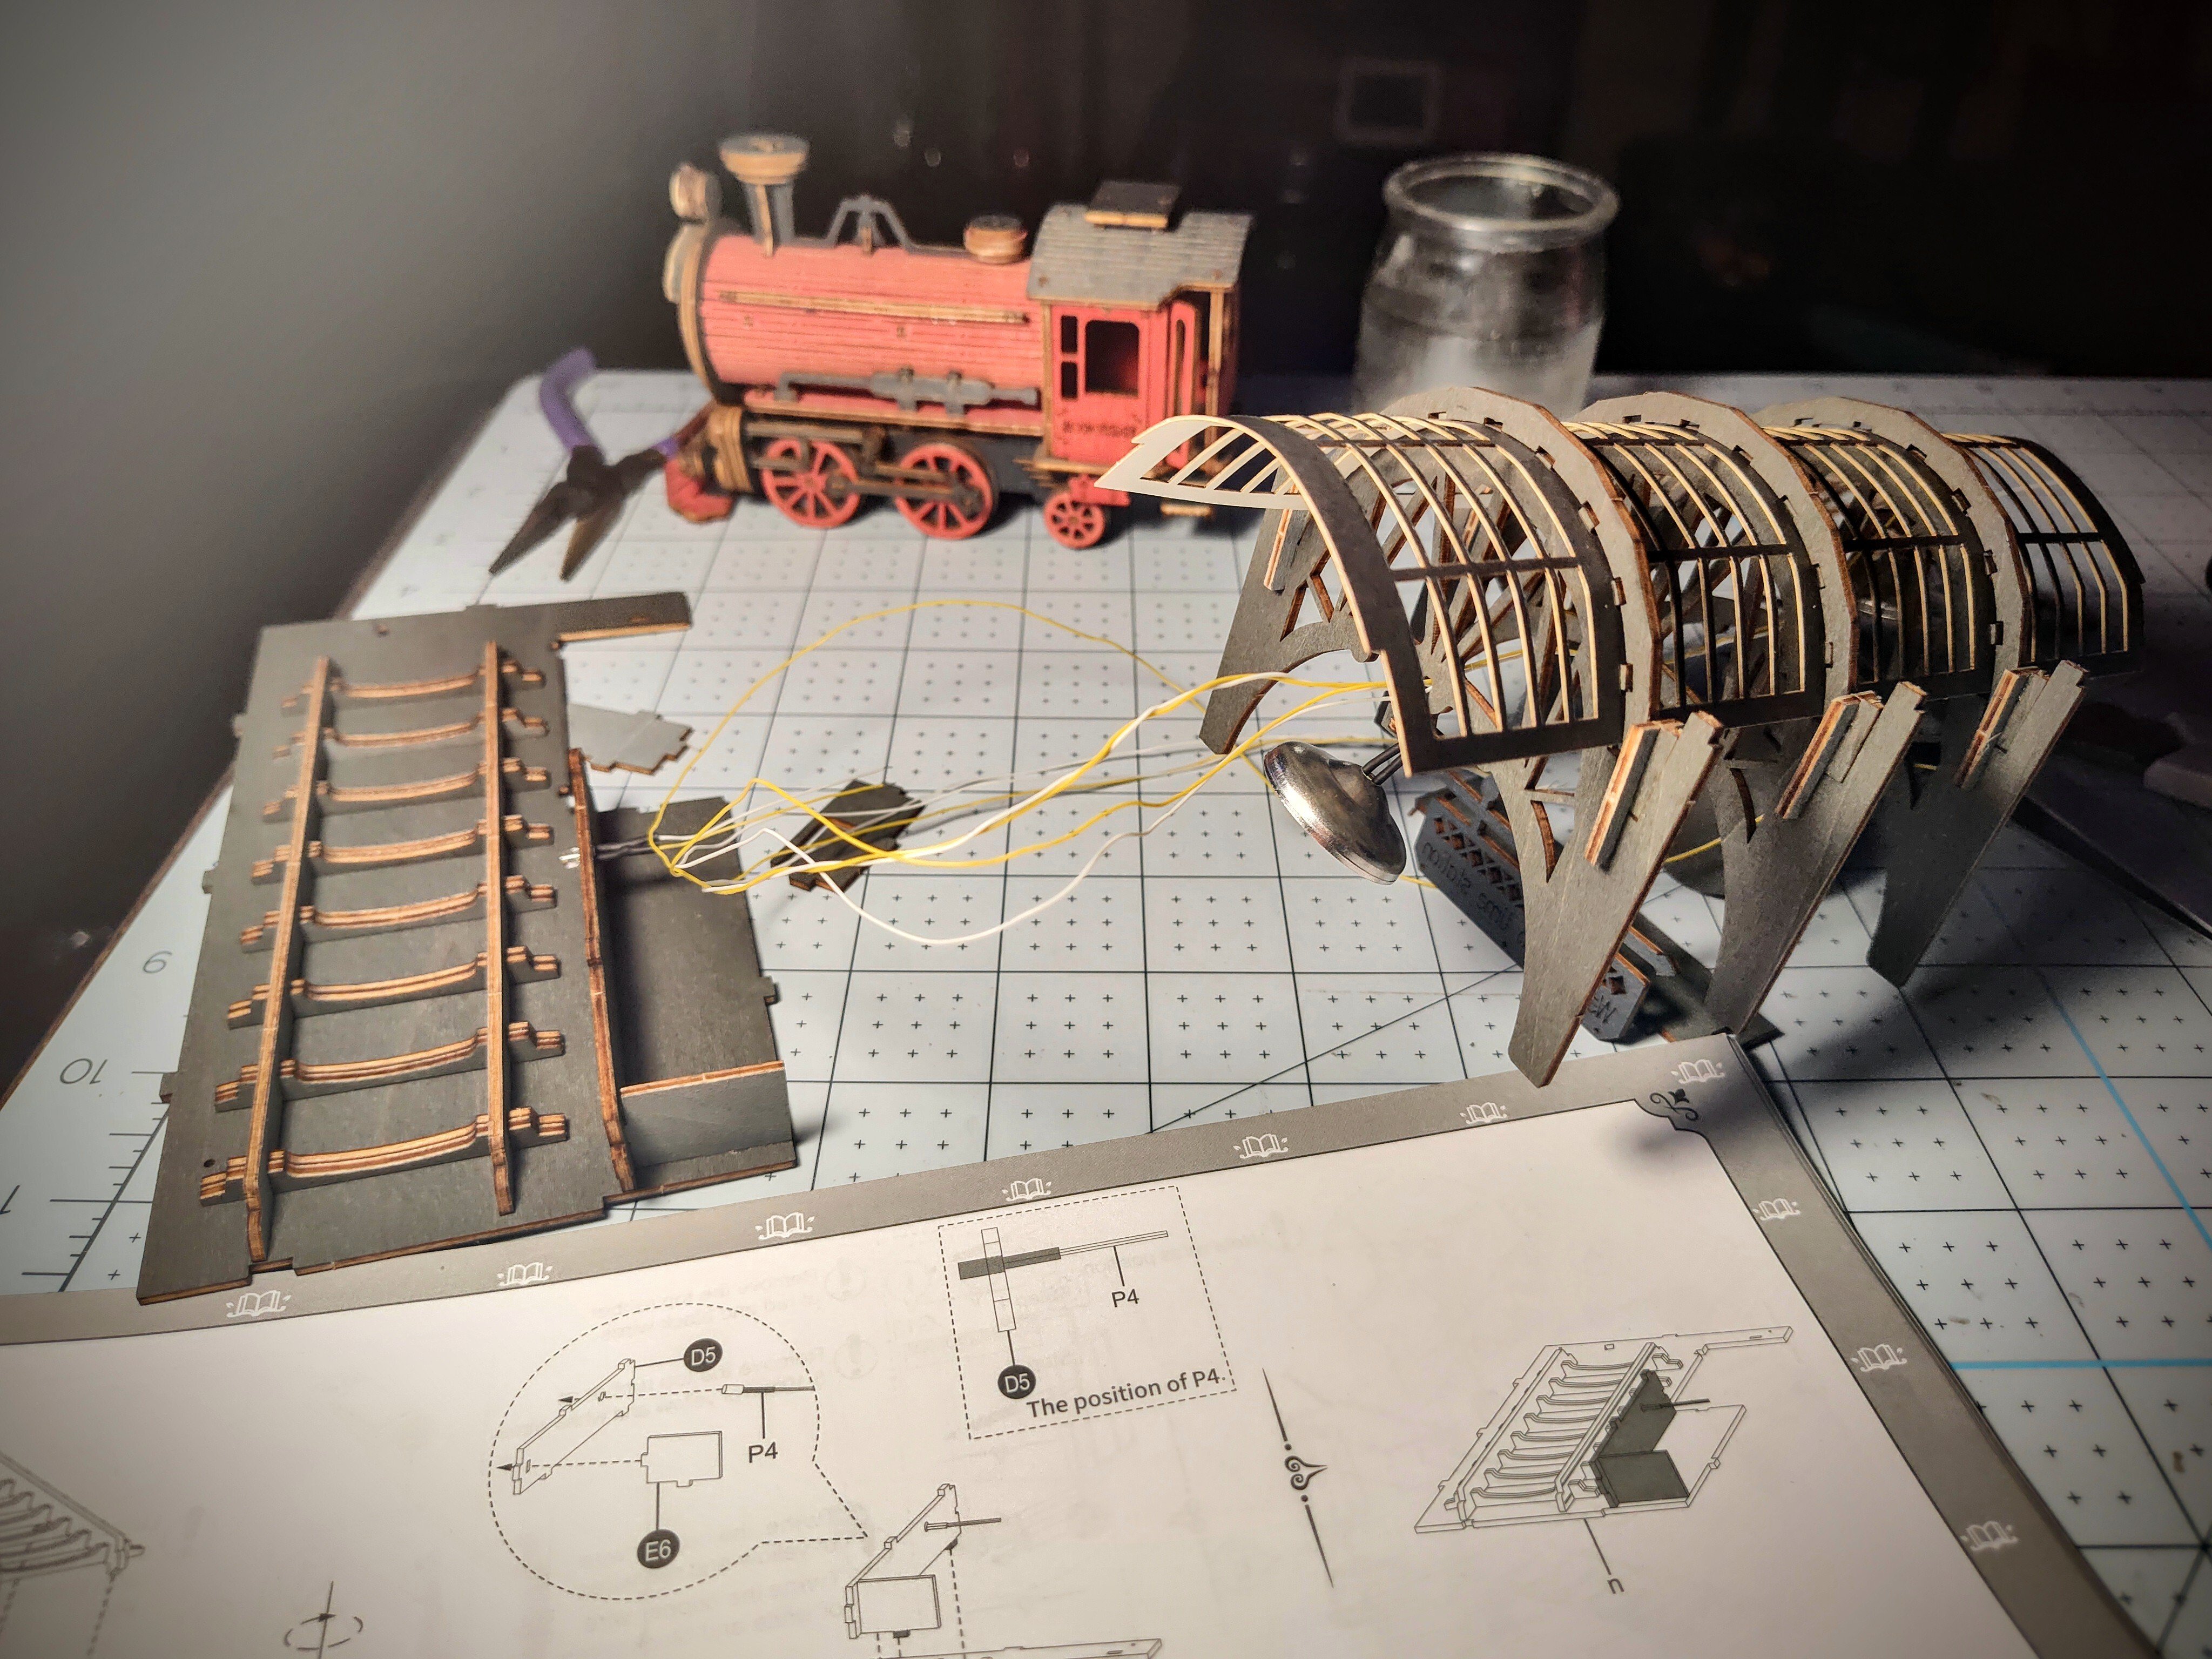
This one is designed in such a way that the wiring was all done at the beginning, so that top part is constantly having to be balanced on something or otherwise carefully tucked away until it's finally set in place on literally the last page of instructions!
It's still a really fun model, I just wish they had set it up for the wiring to be done closer to the end like the other ones I've built
Finally got this off my bench. The terrain didn't end up quite how I wanted but it was my first go so I learned a lot.
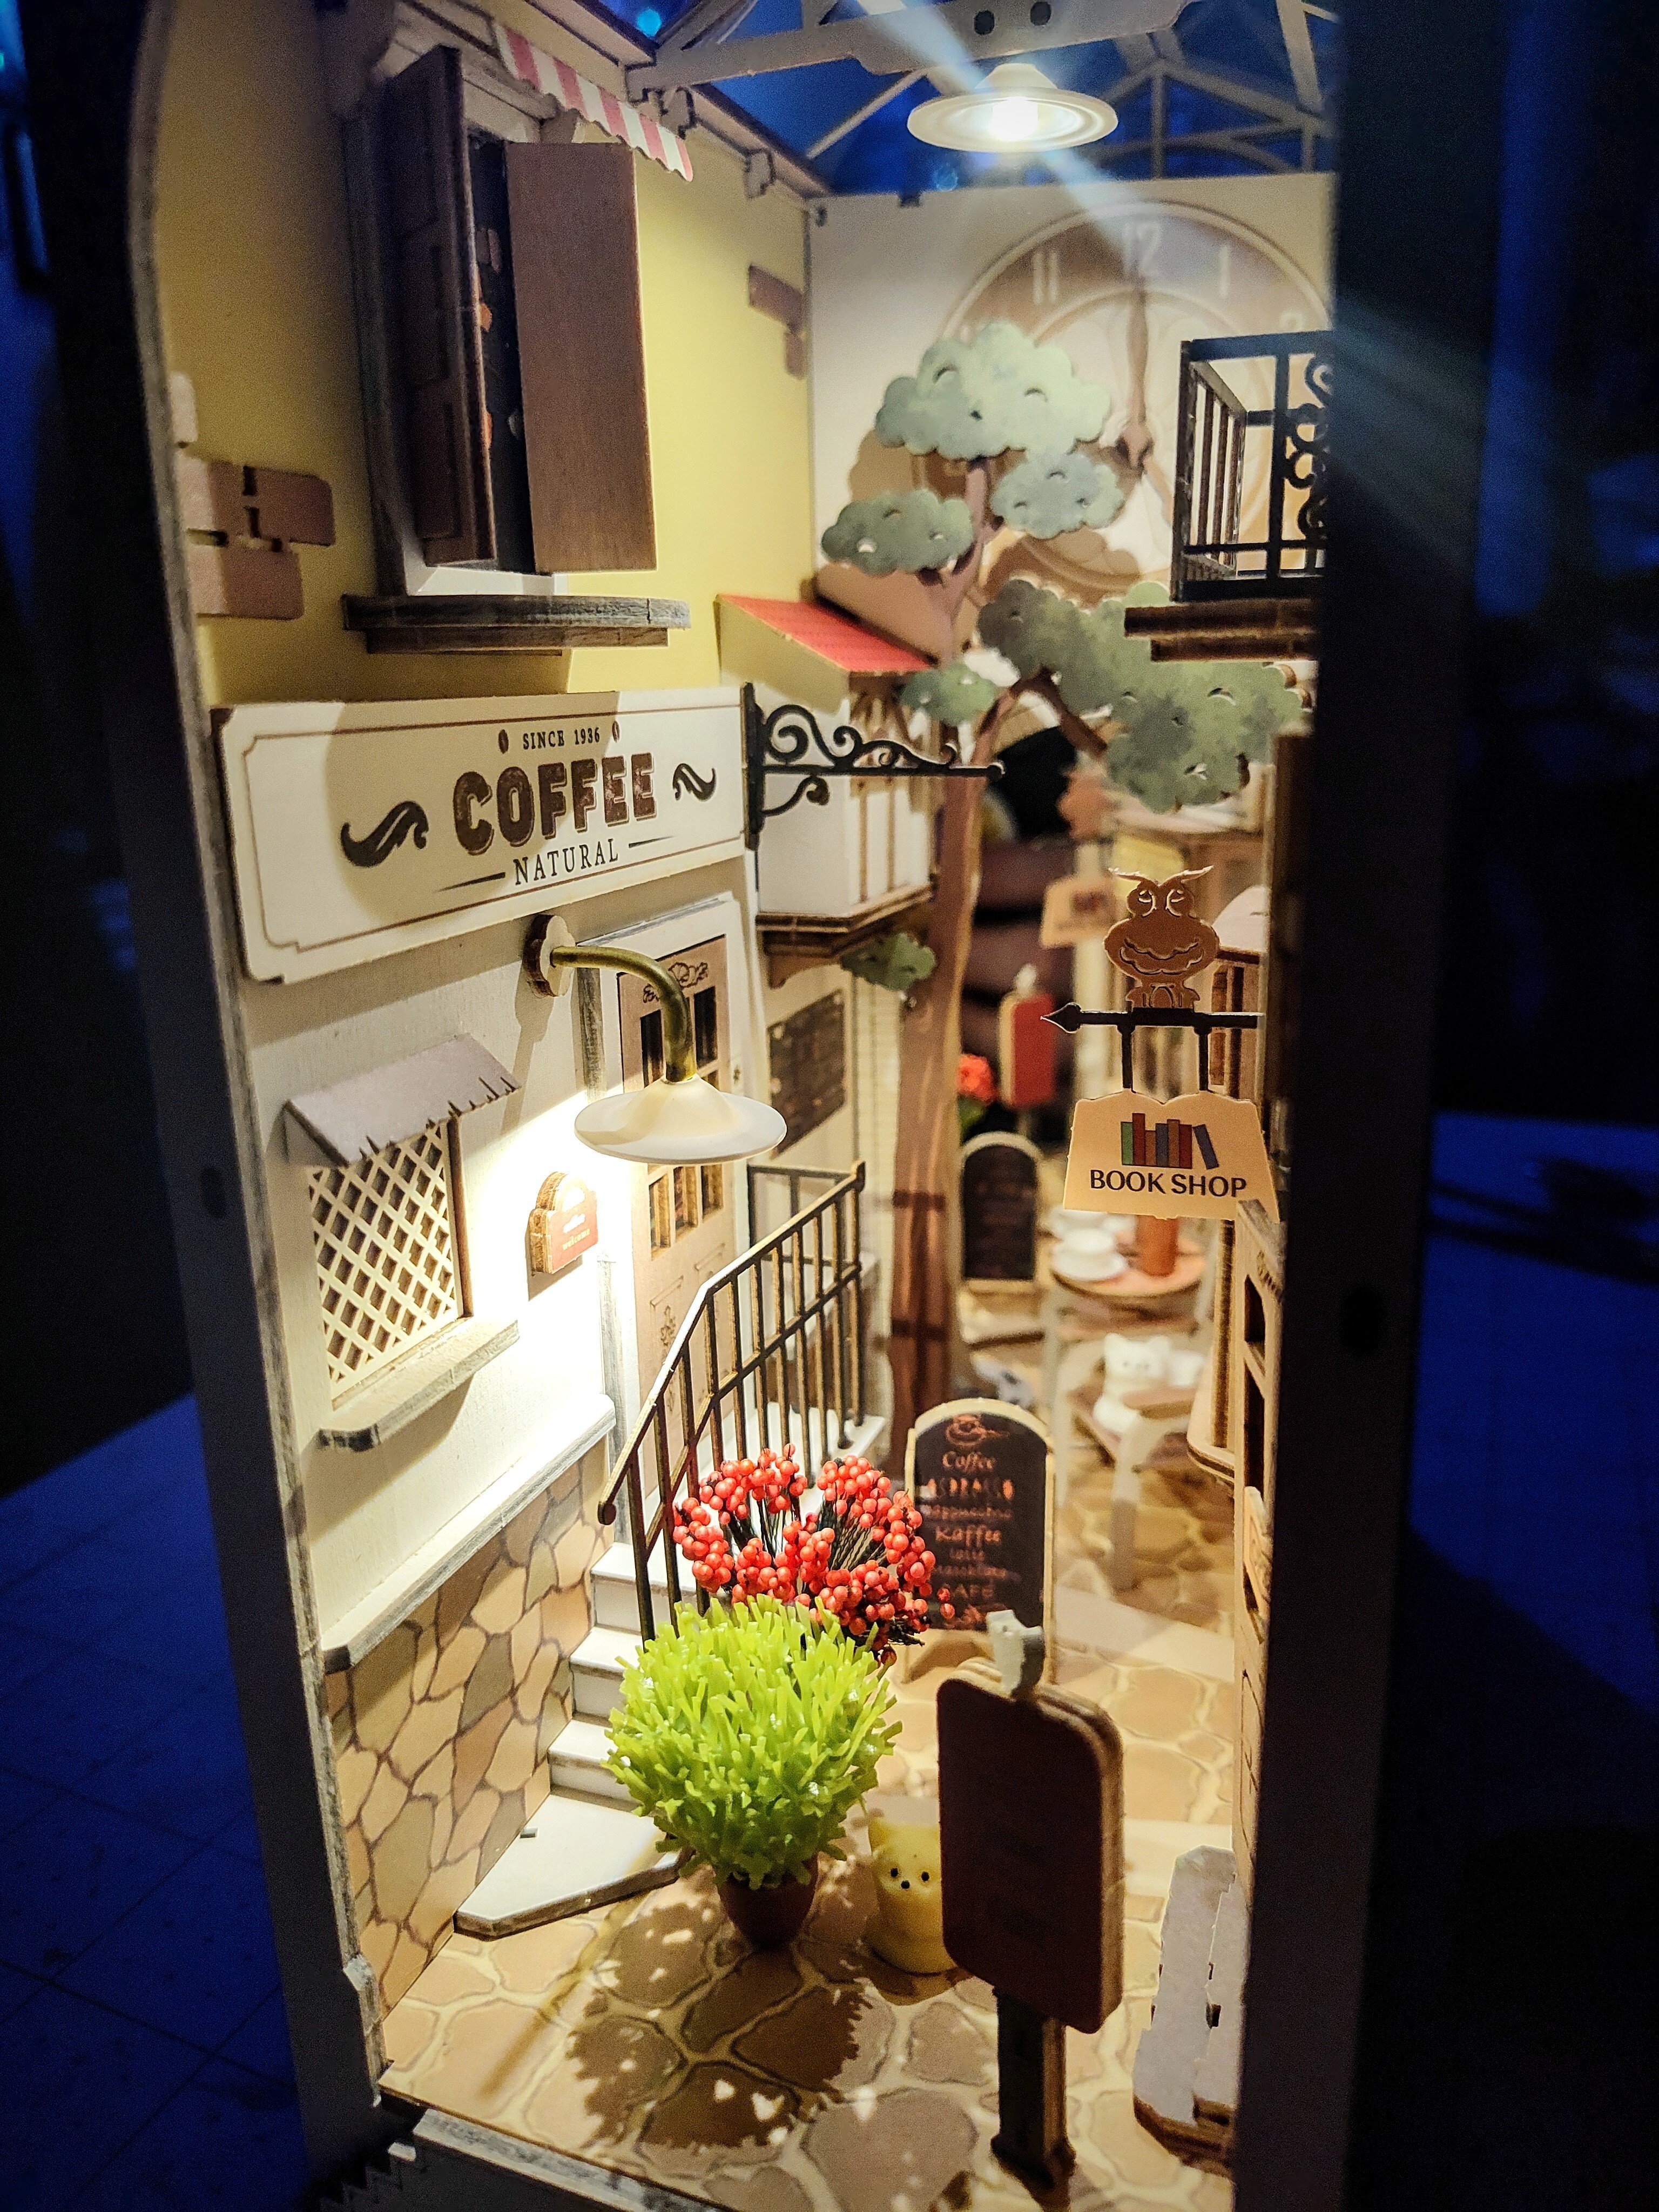
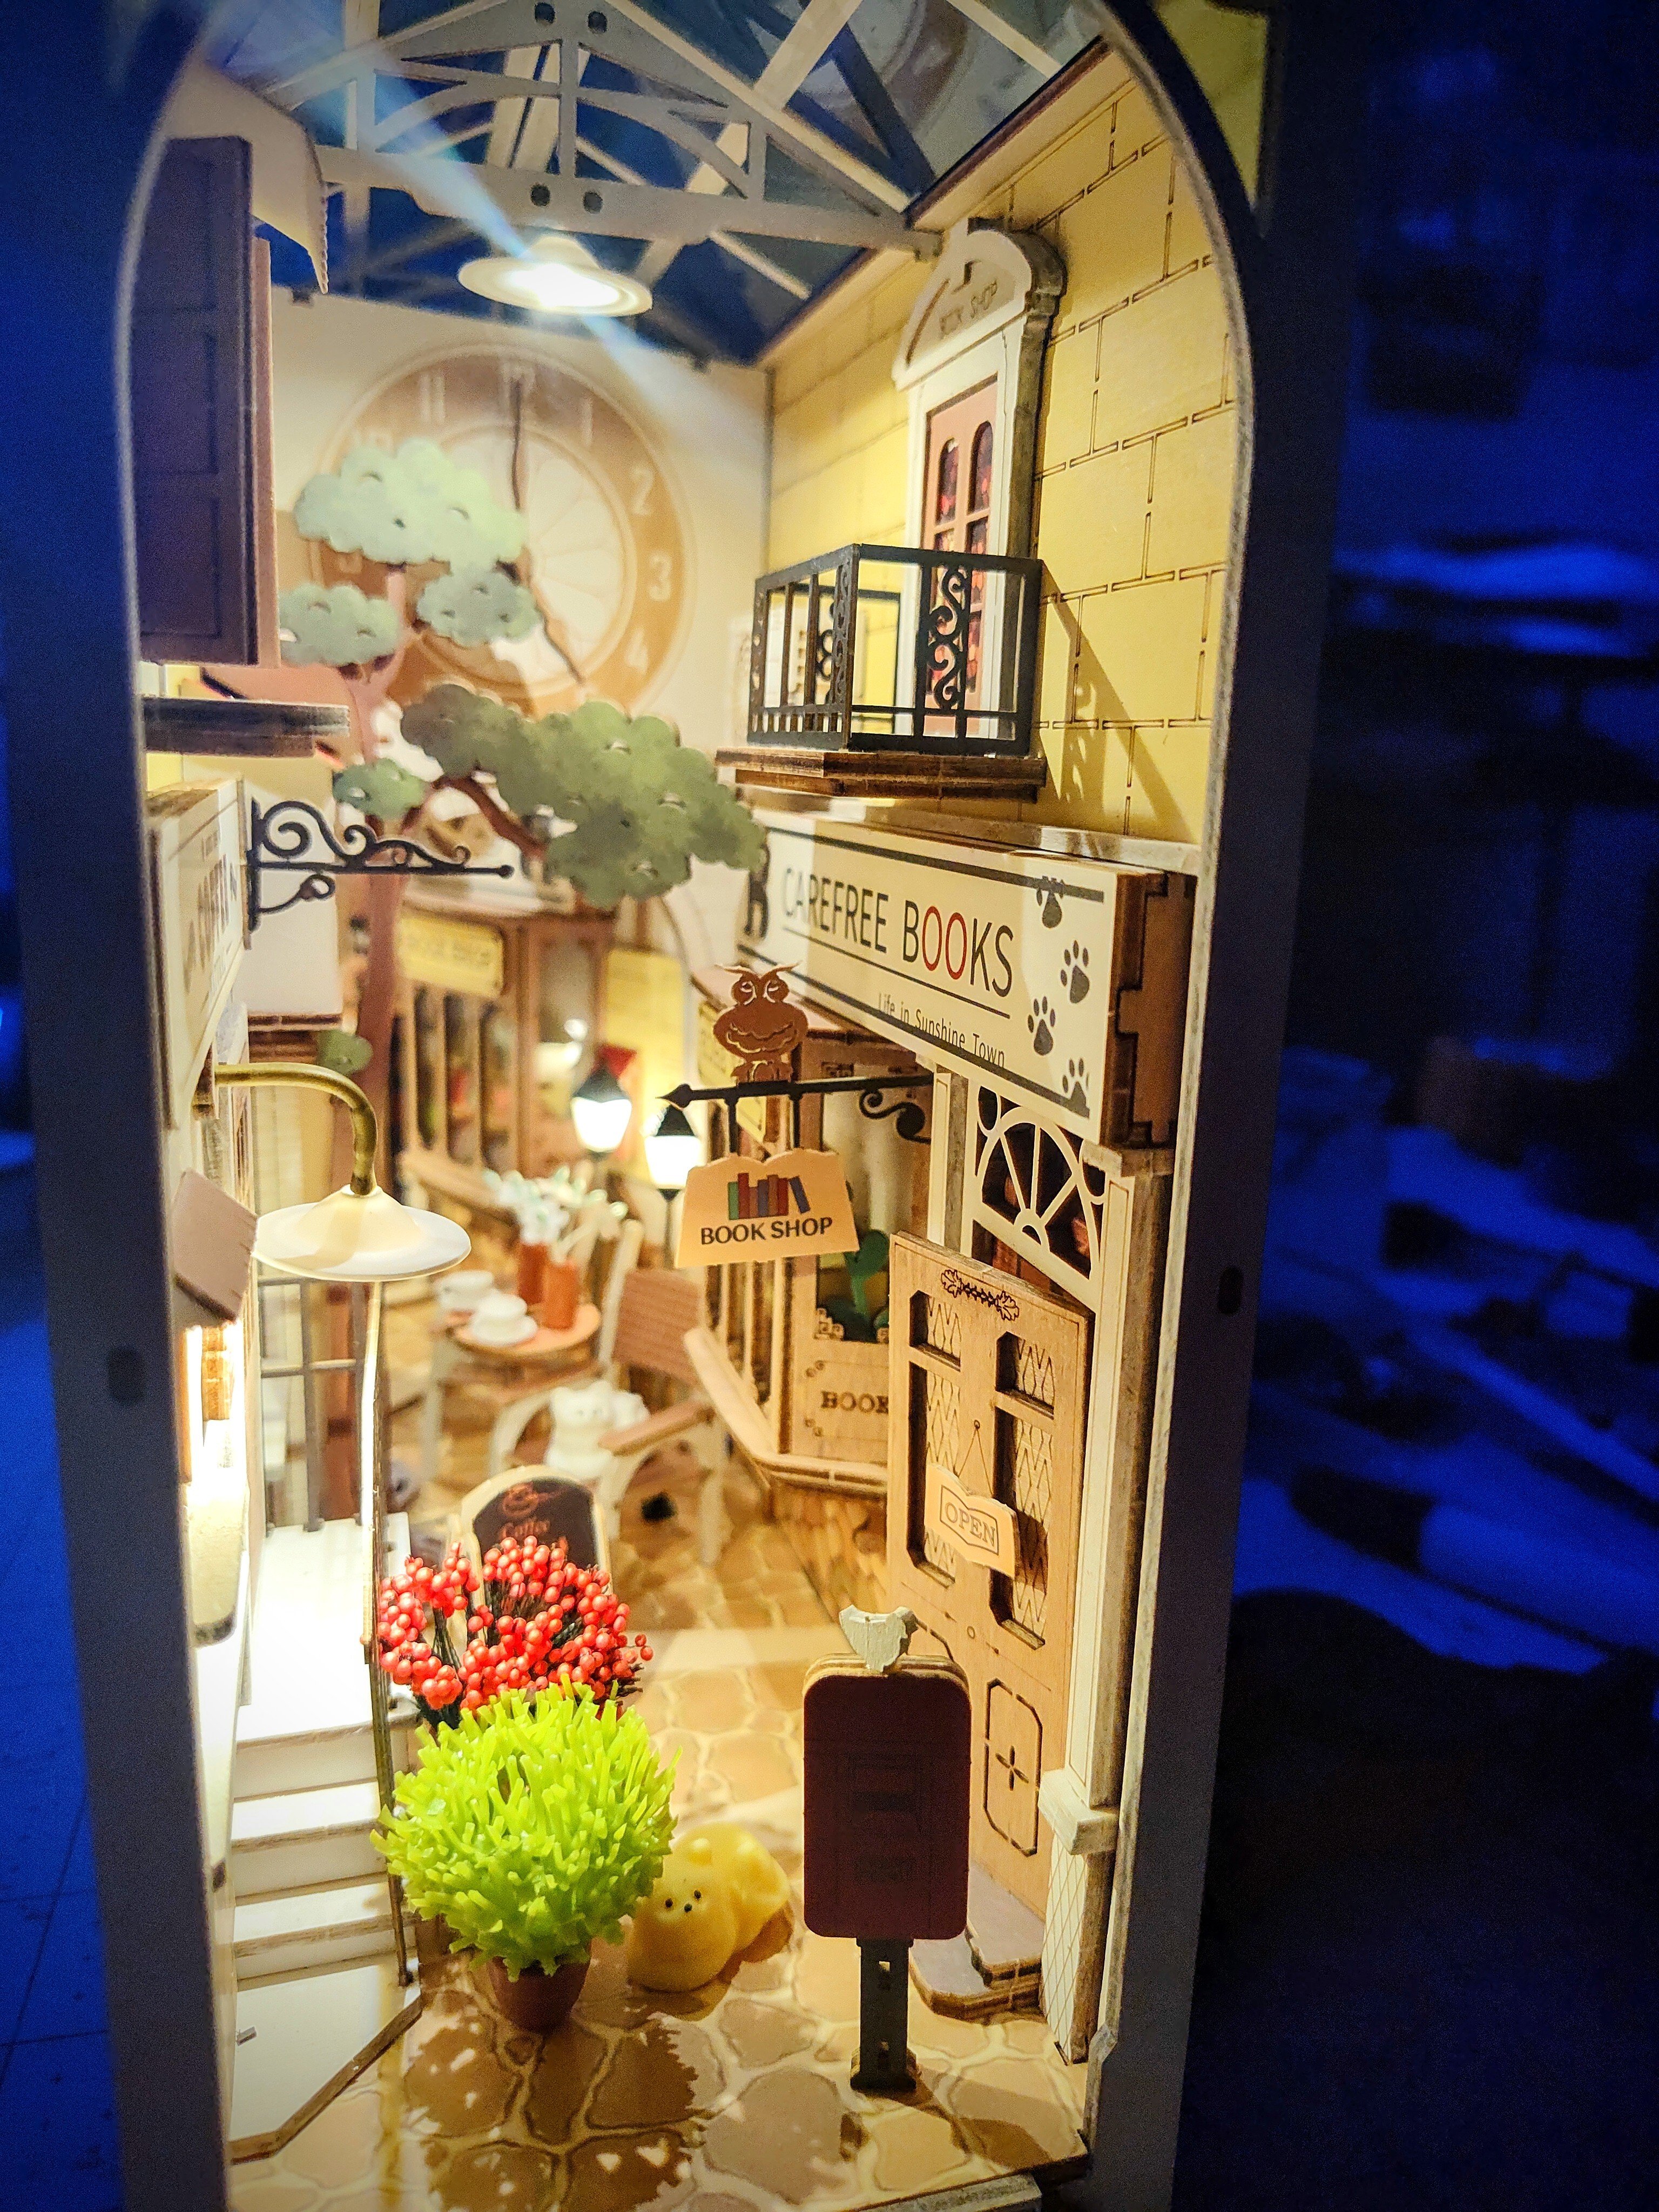
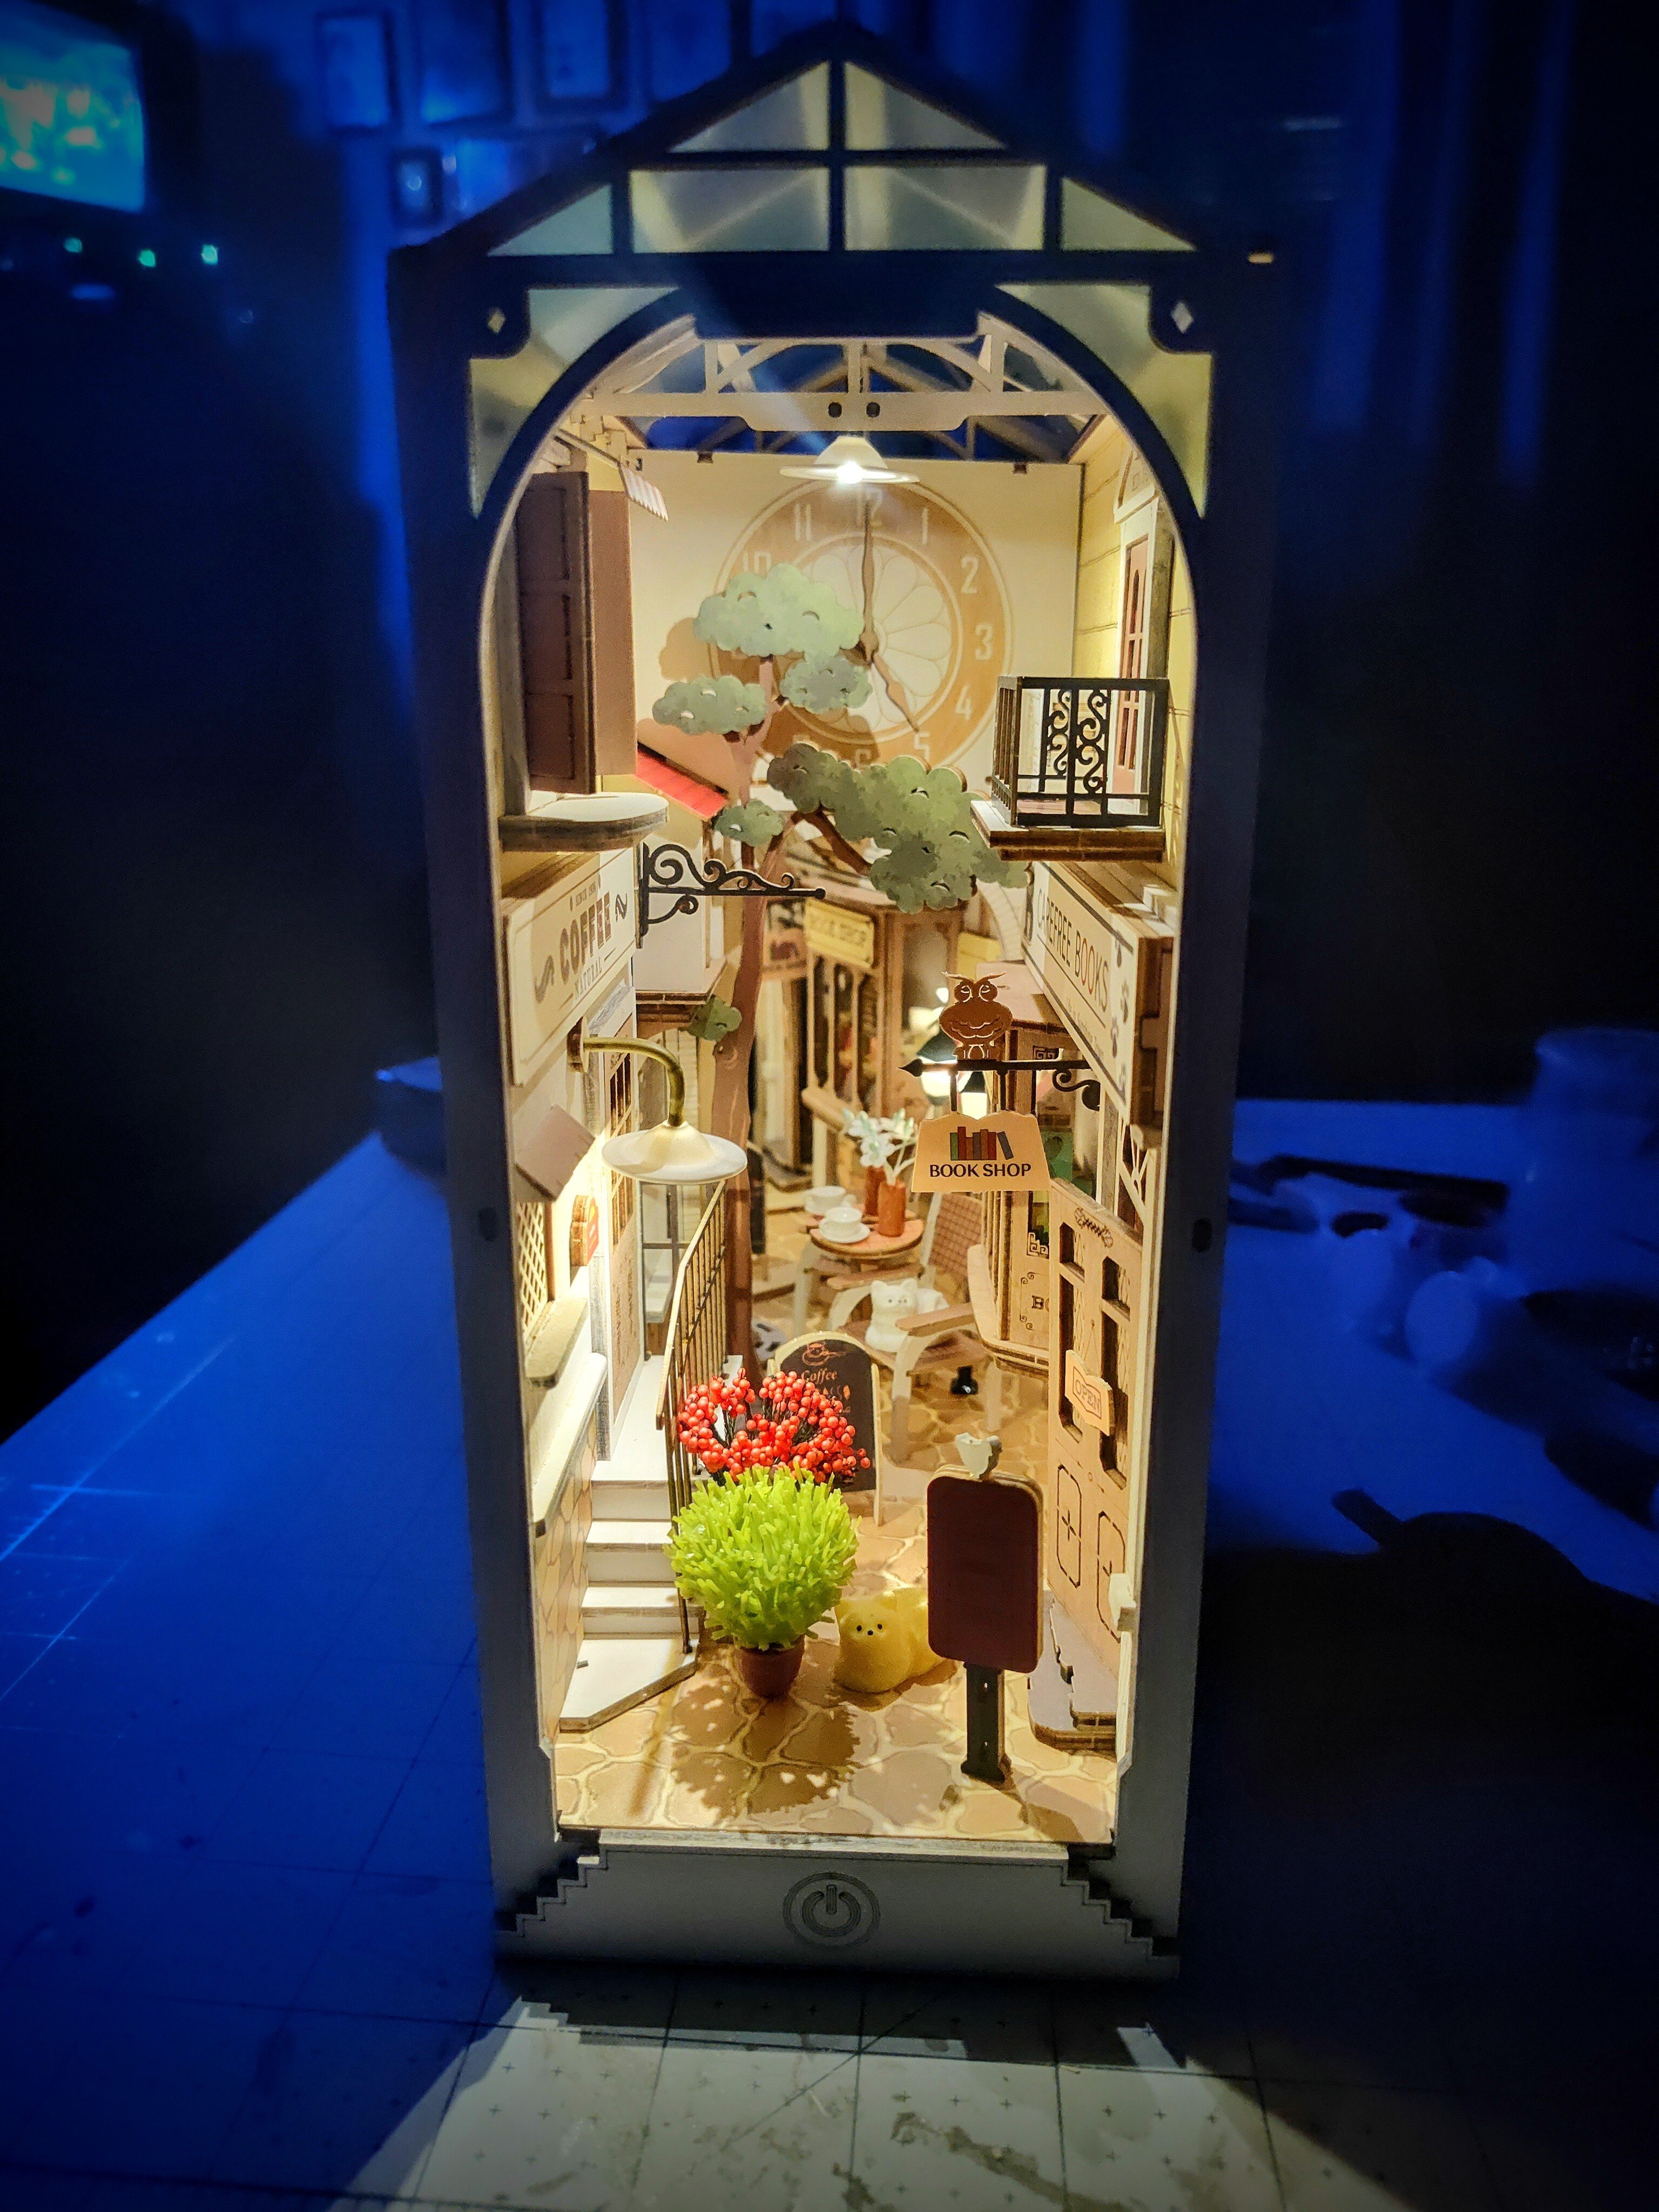
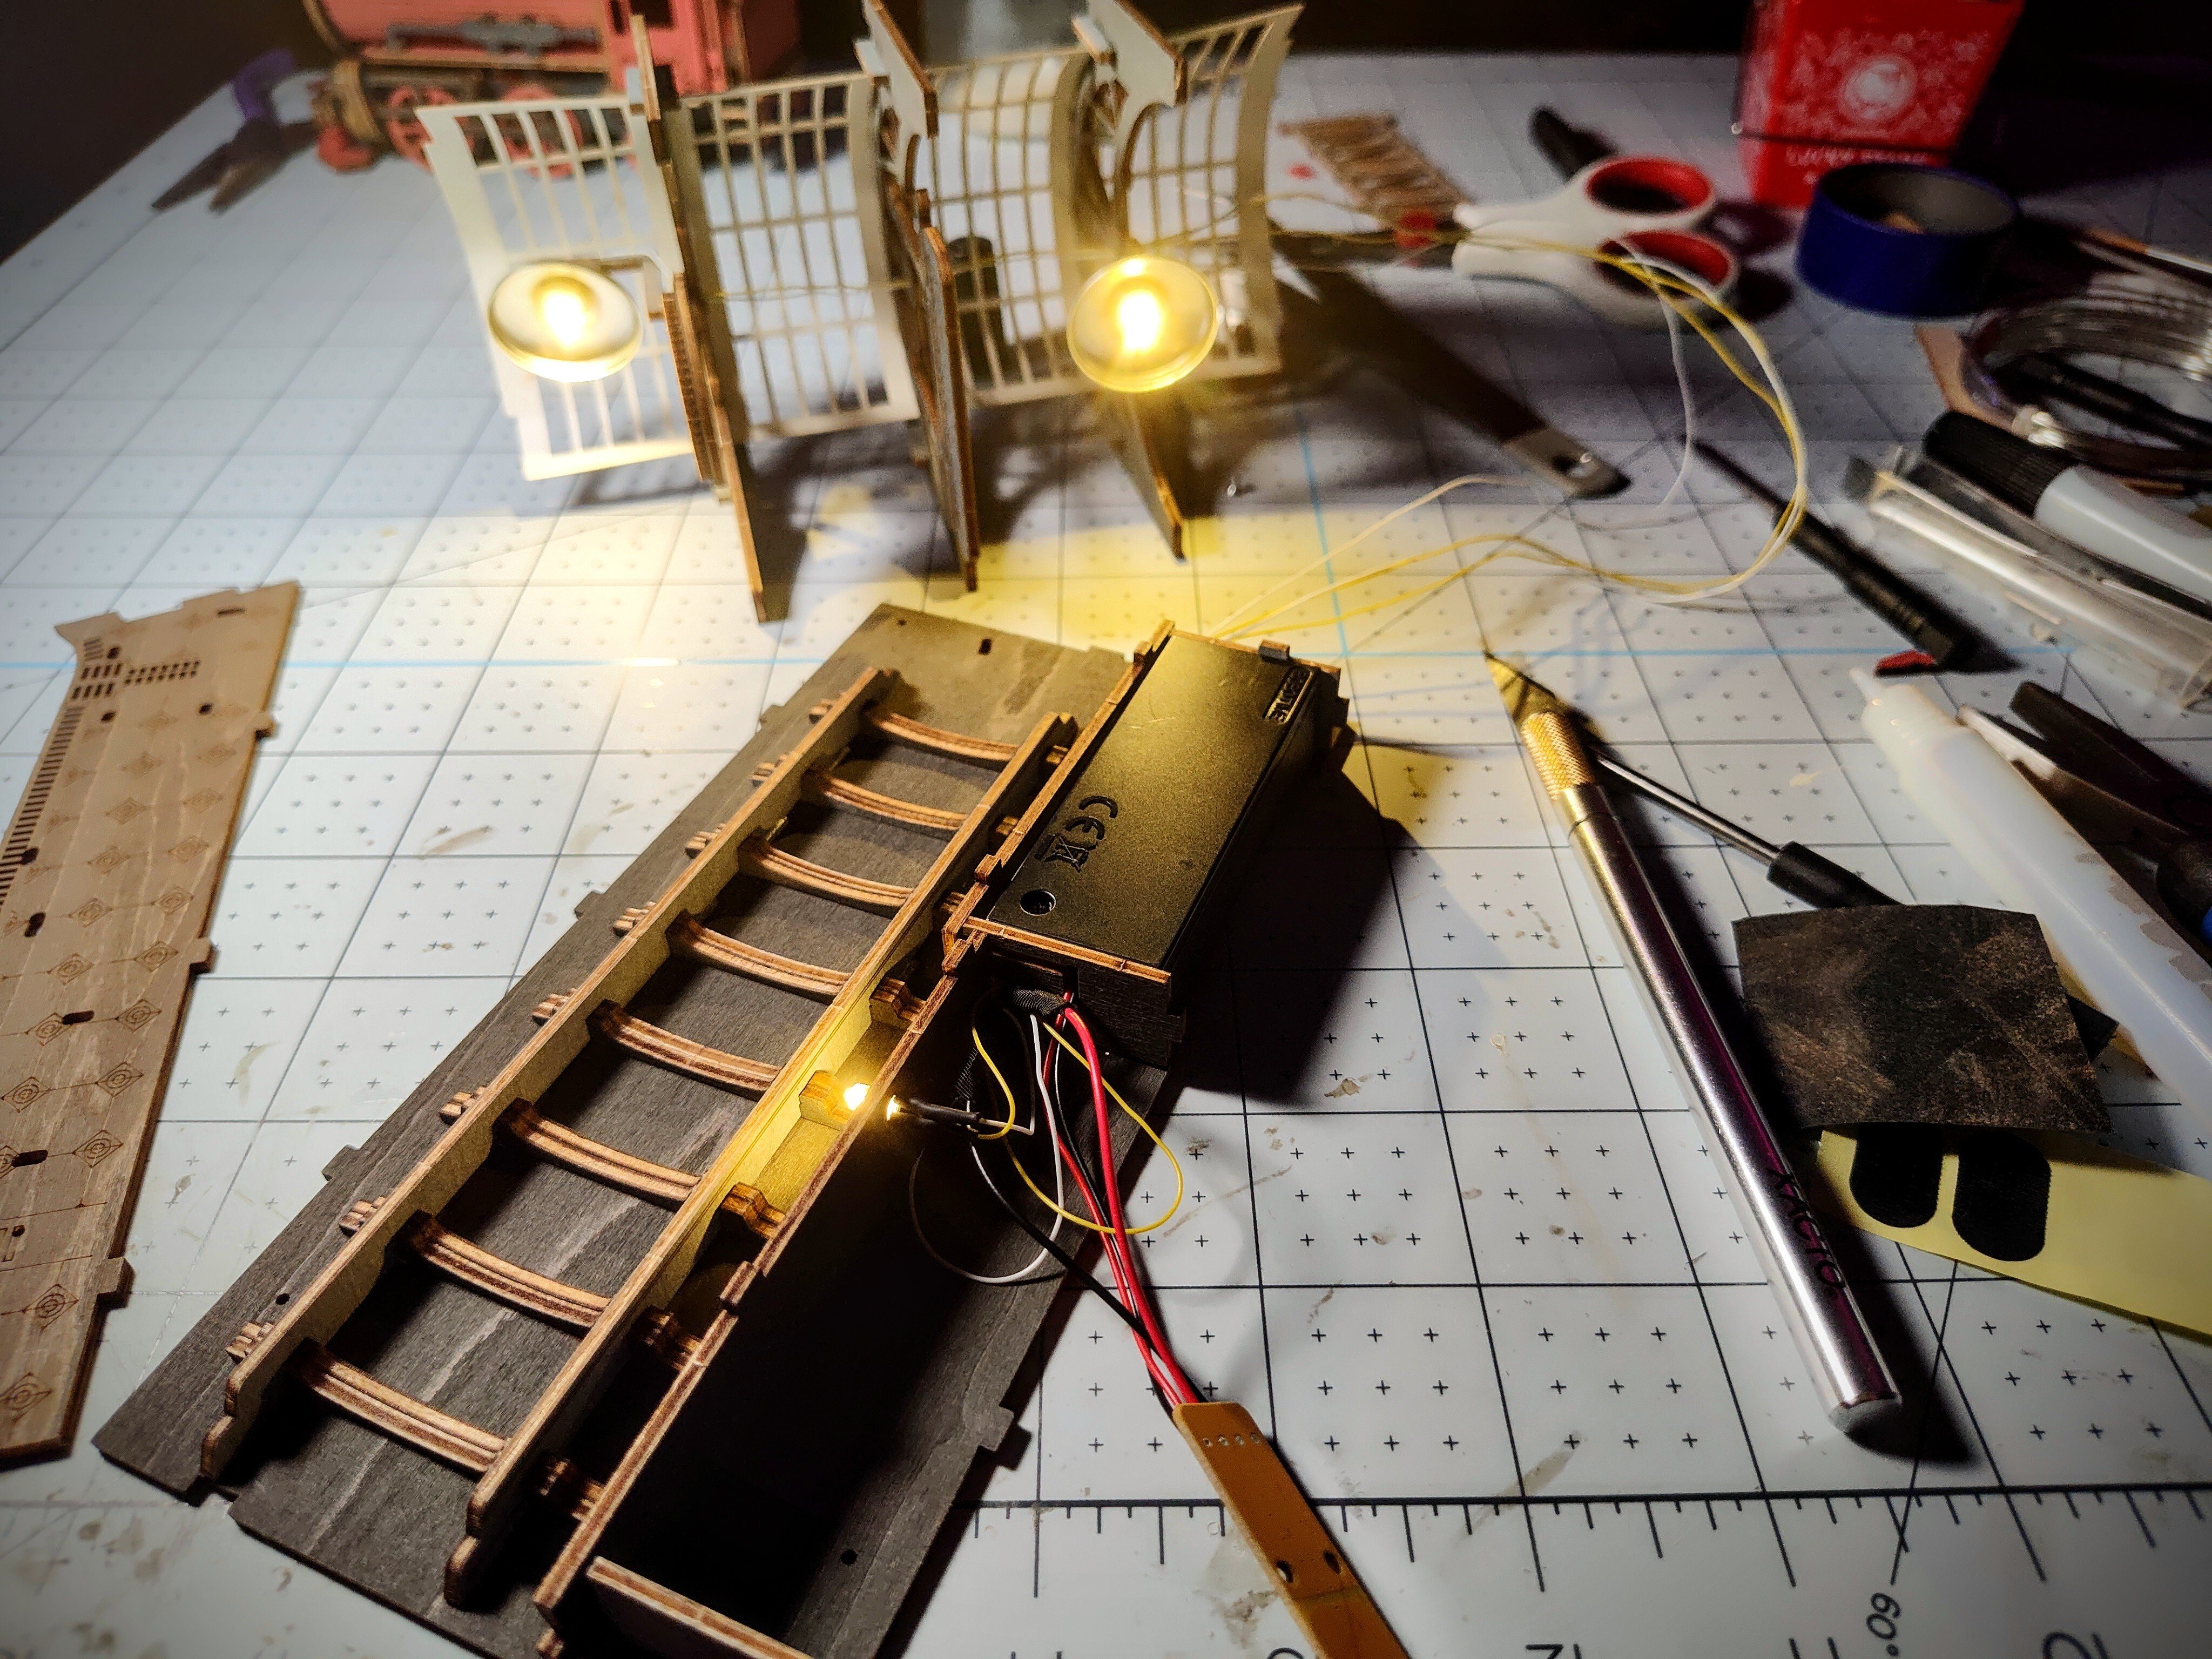
After several weeks off due to illness I've started working on this one again! Believe it or not there are still MORE BOOKS I need to make lol I decided to take a break from that and work on the wiring. The directions say little more than "jam everything together and twist the similar colored wires together" so it's been a little challenging!
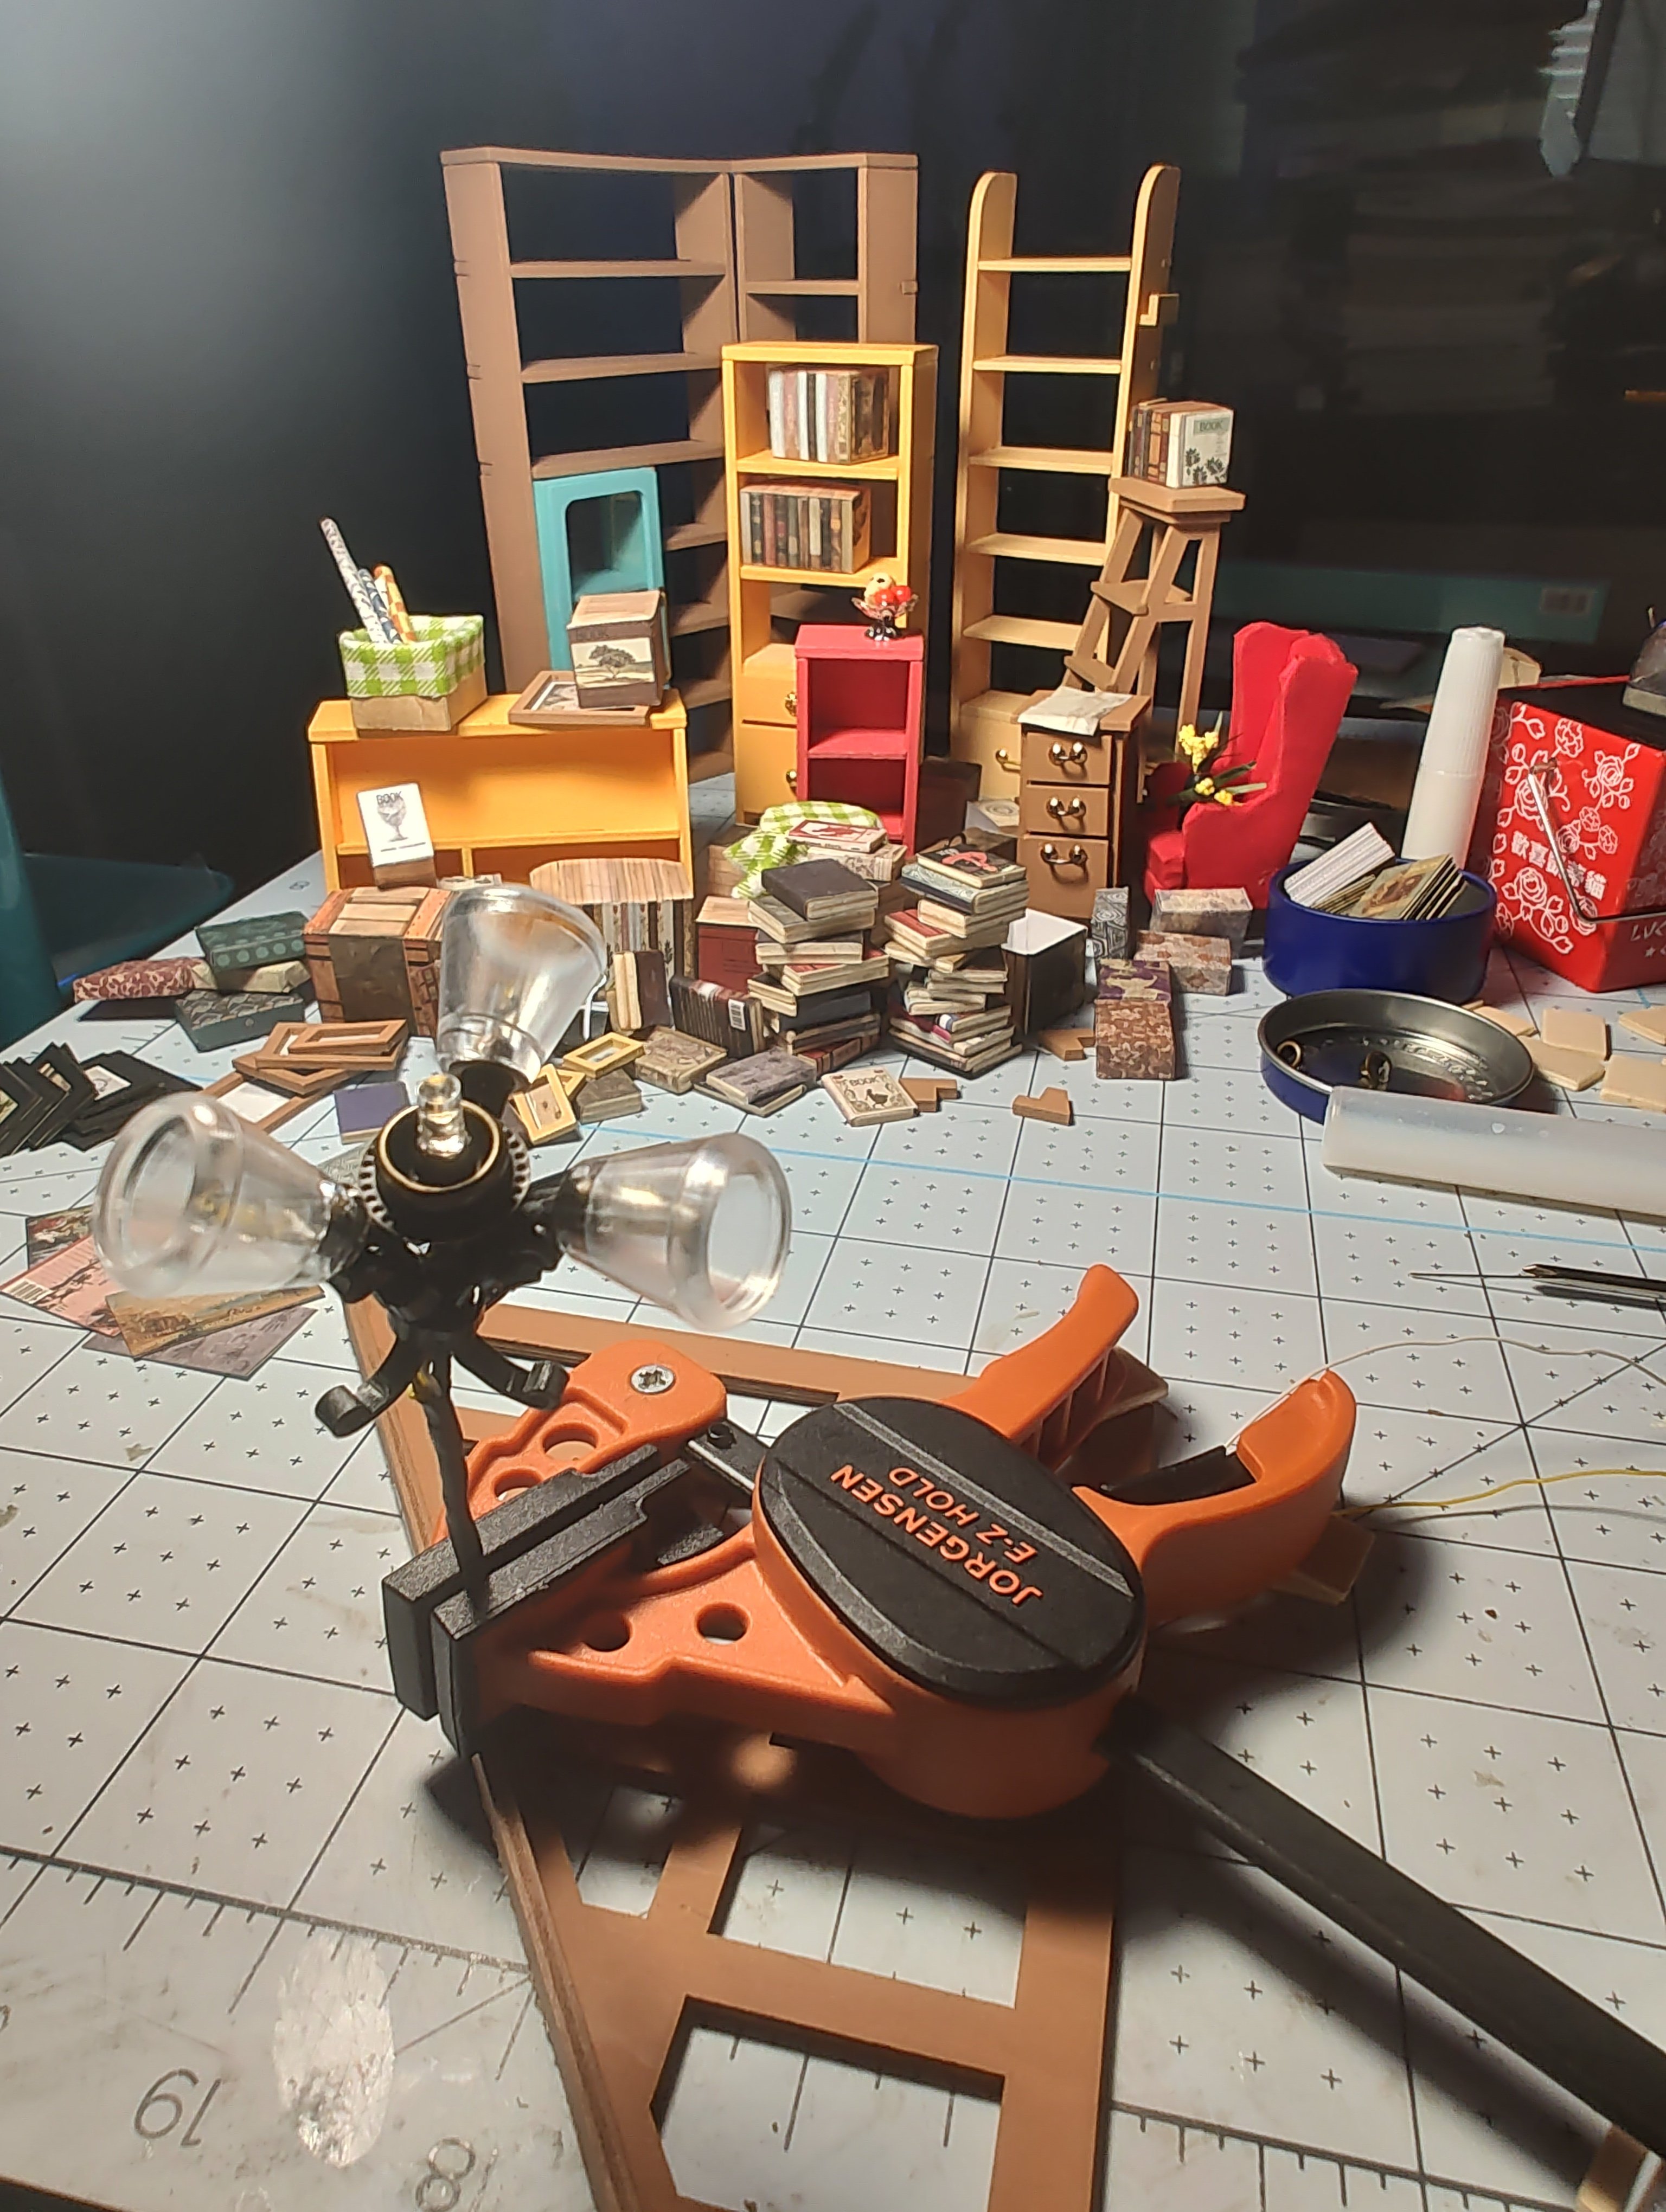
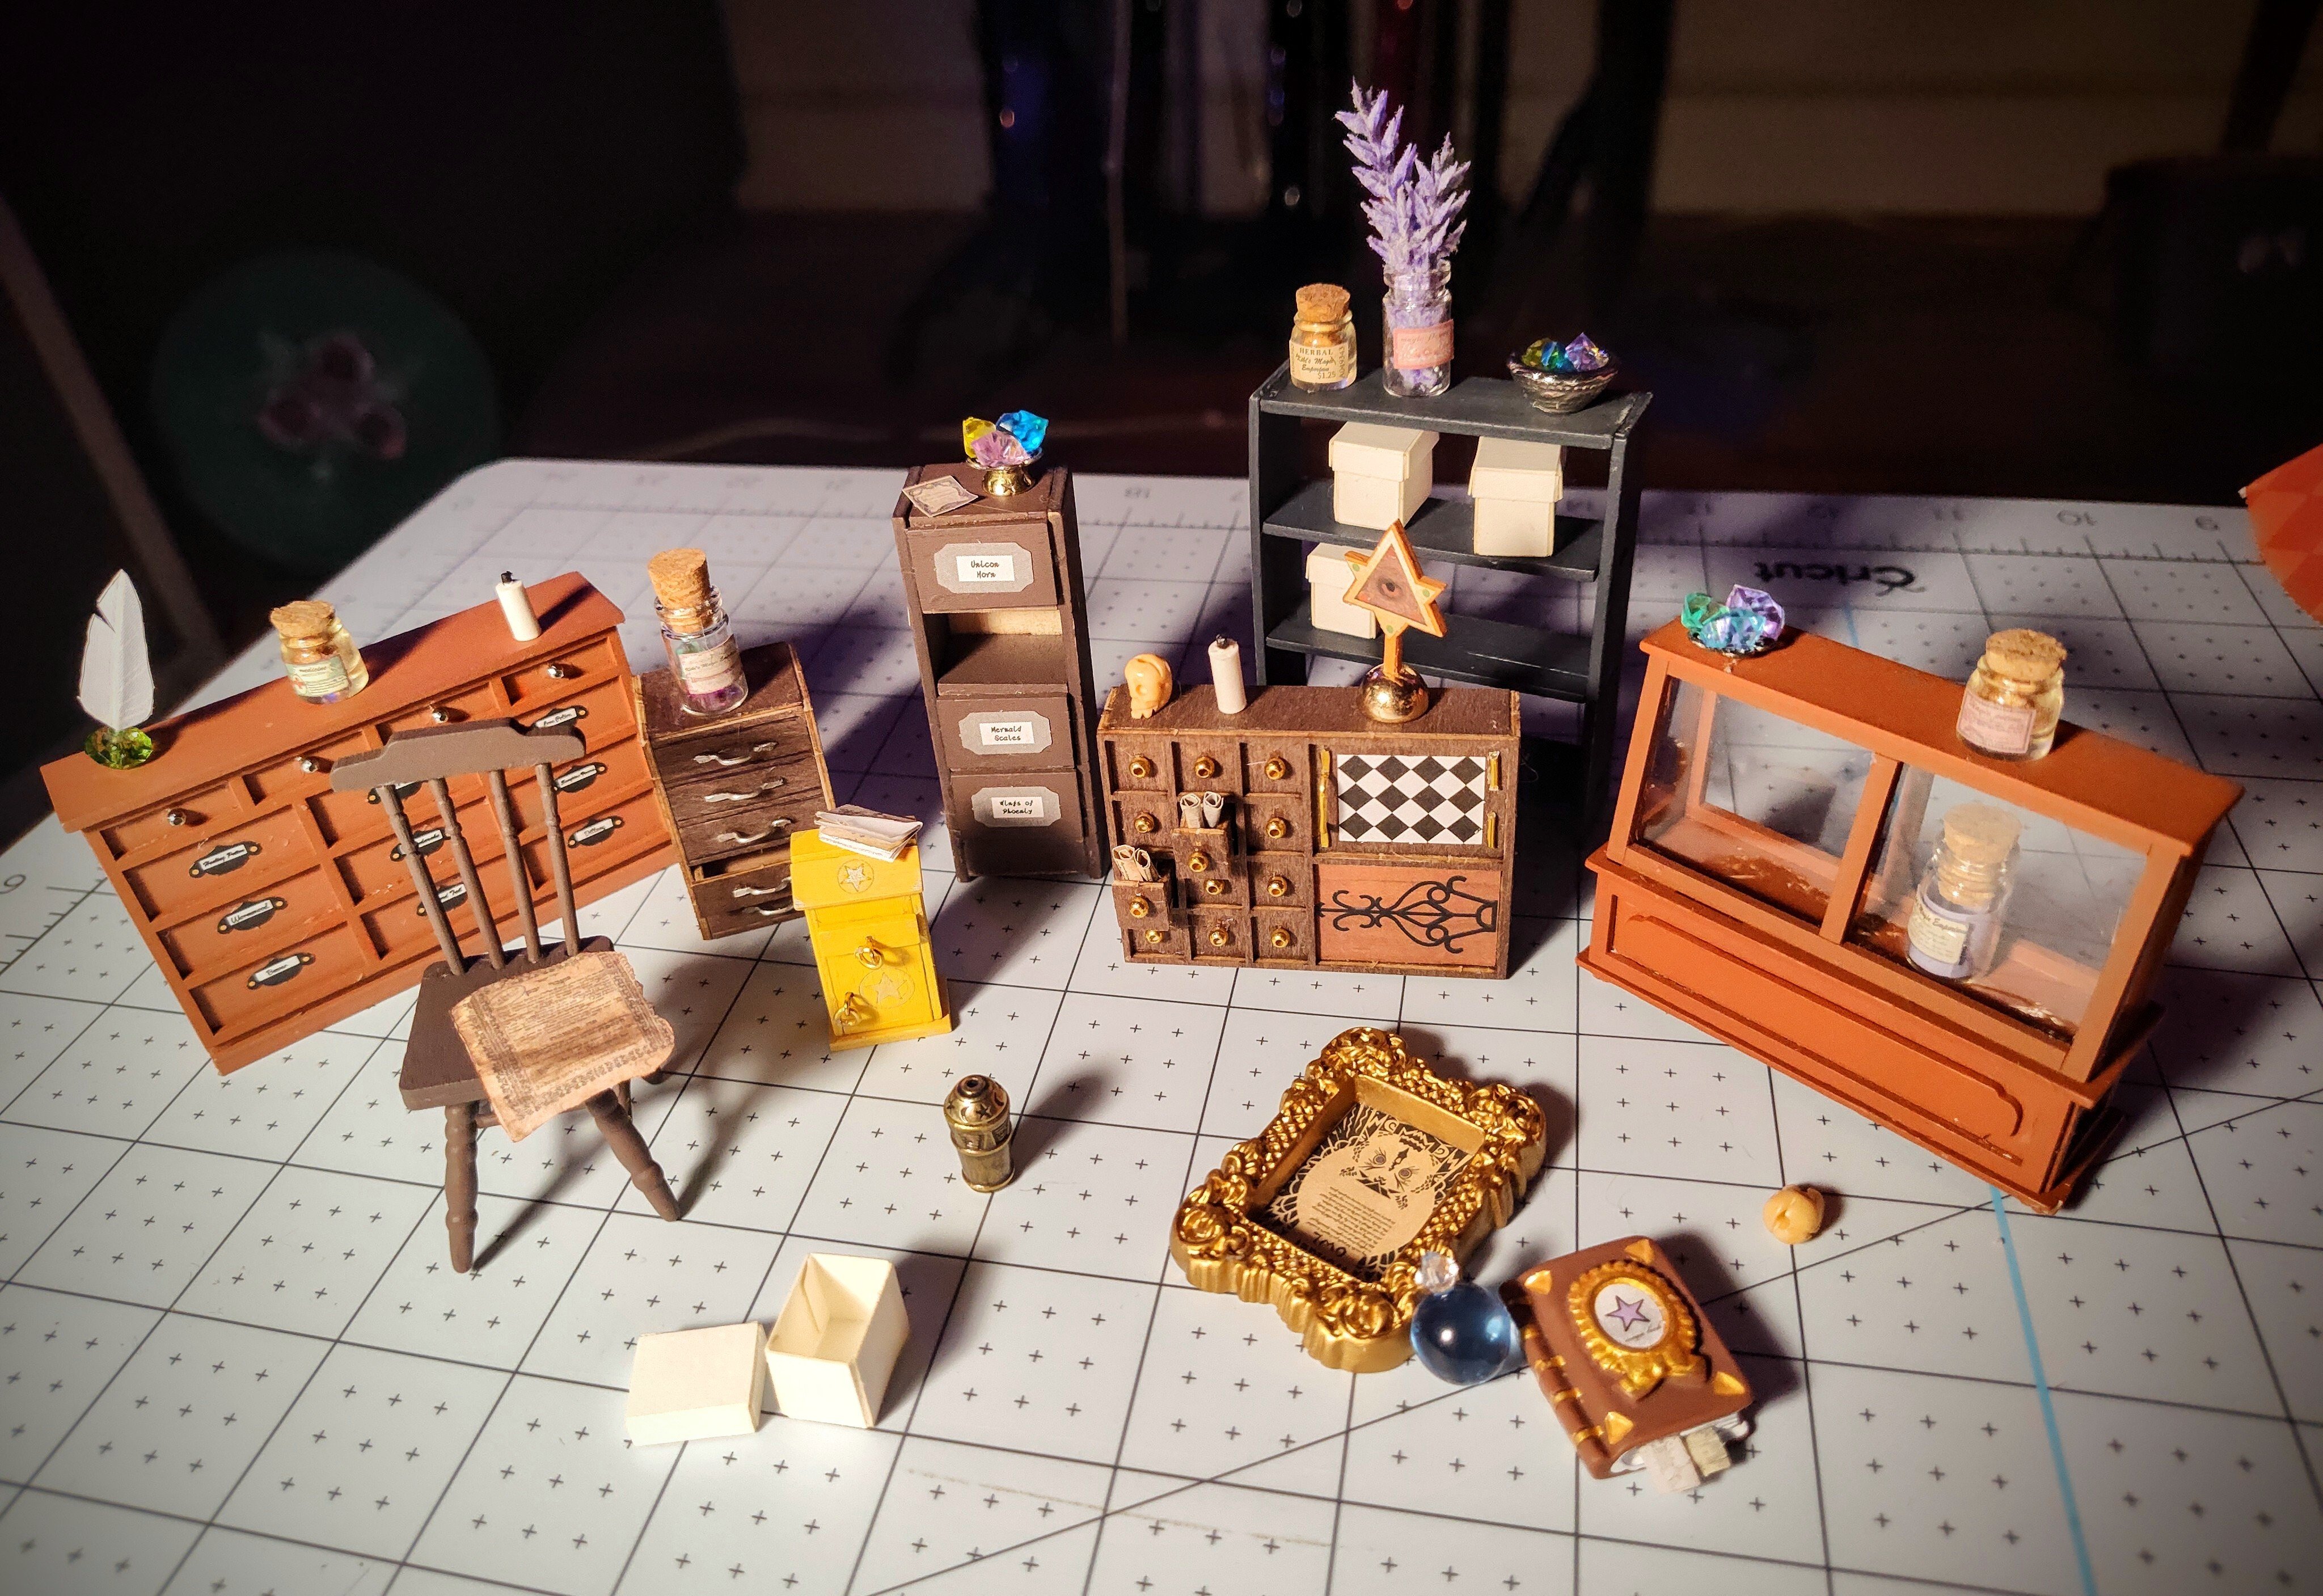
This is pretty much all the furniture that will go in this one! Now I'm starting the daunting task of building all the books that go on the shelves lol

This one went pretty fast! These book nook models really kind of fall in between model making and something like a 3d puzzle, so I ended up finishing it after just a few days, but it was still really fun! There are 4 different LED lights I had to rig up here and they all connect to a touch sensor on the base so you don't have to take it off the shelf to turn it on and off.
It was fun to build but I think I'll go back to building the more traditional models after this


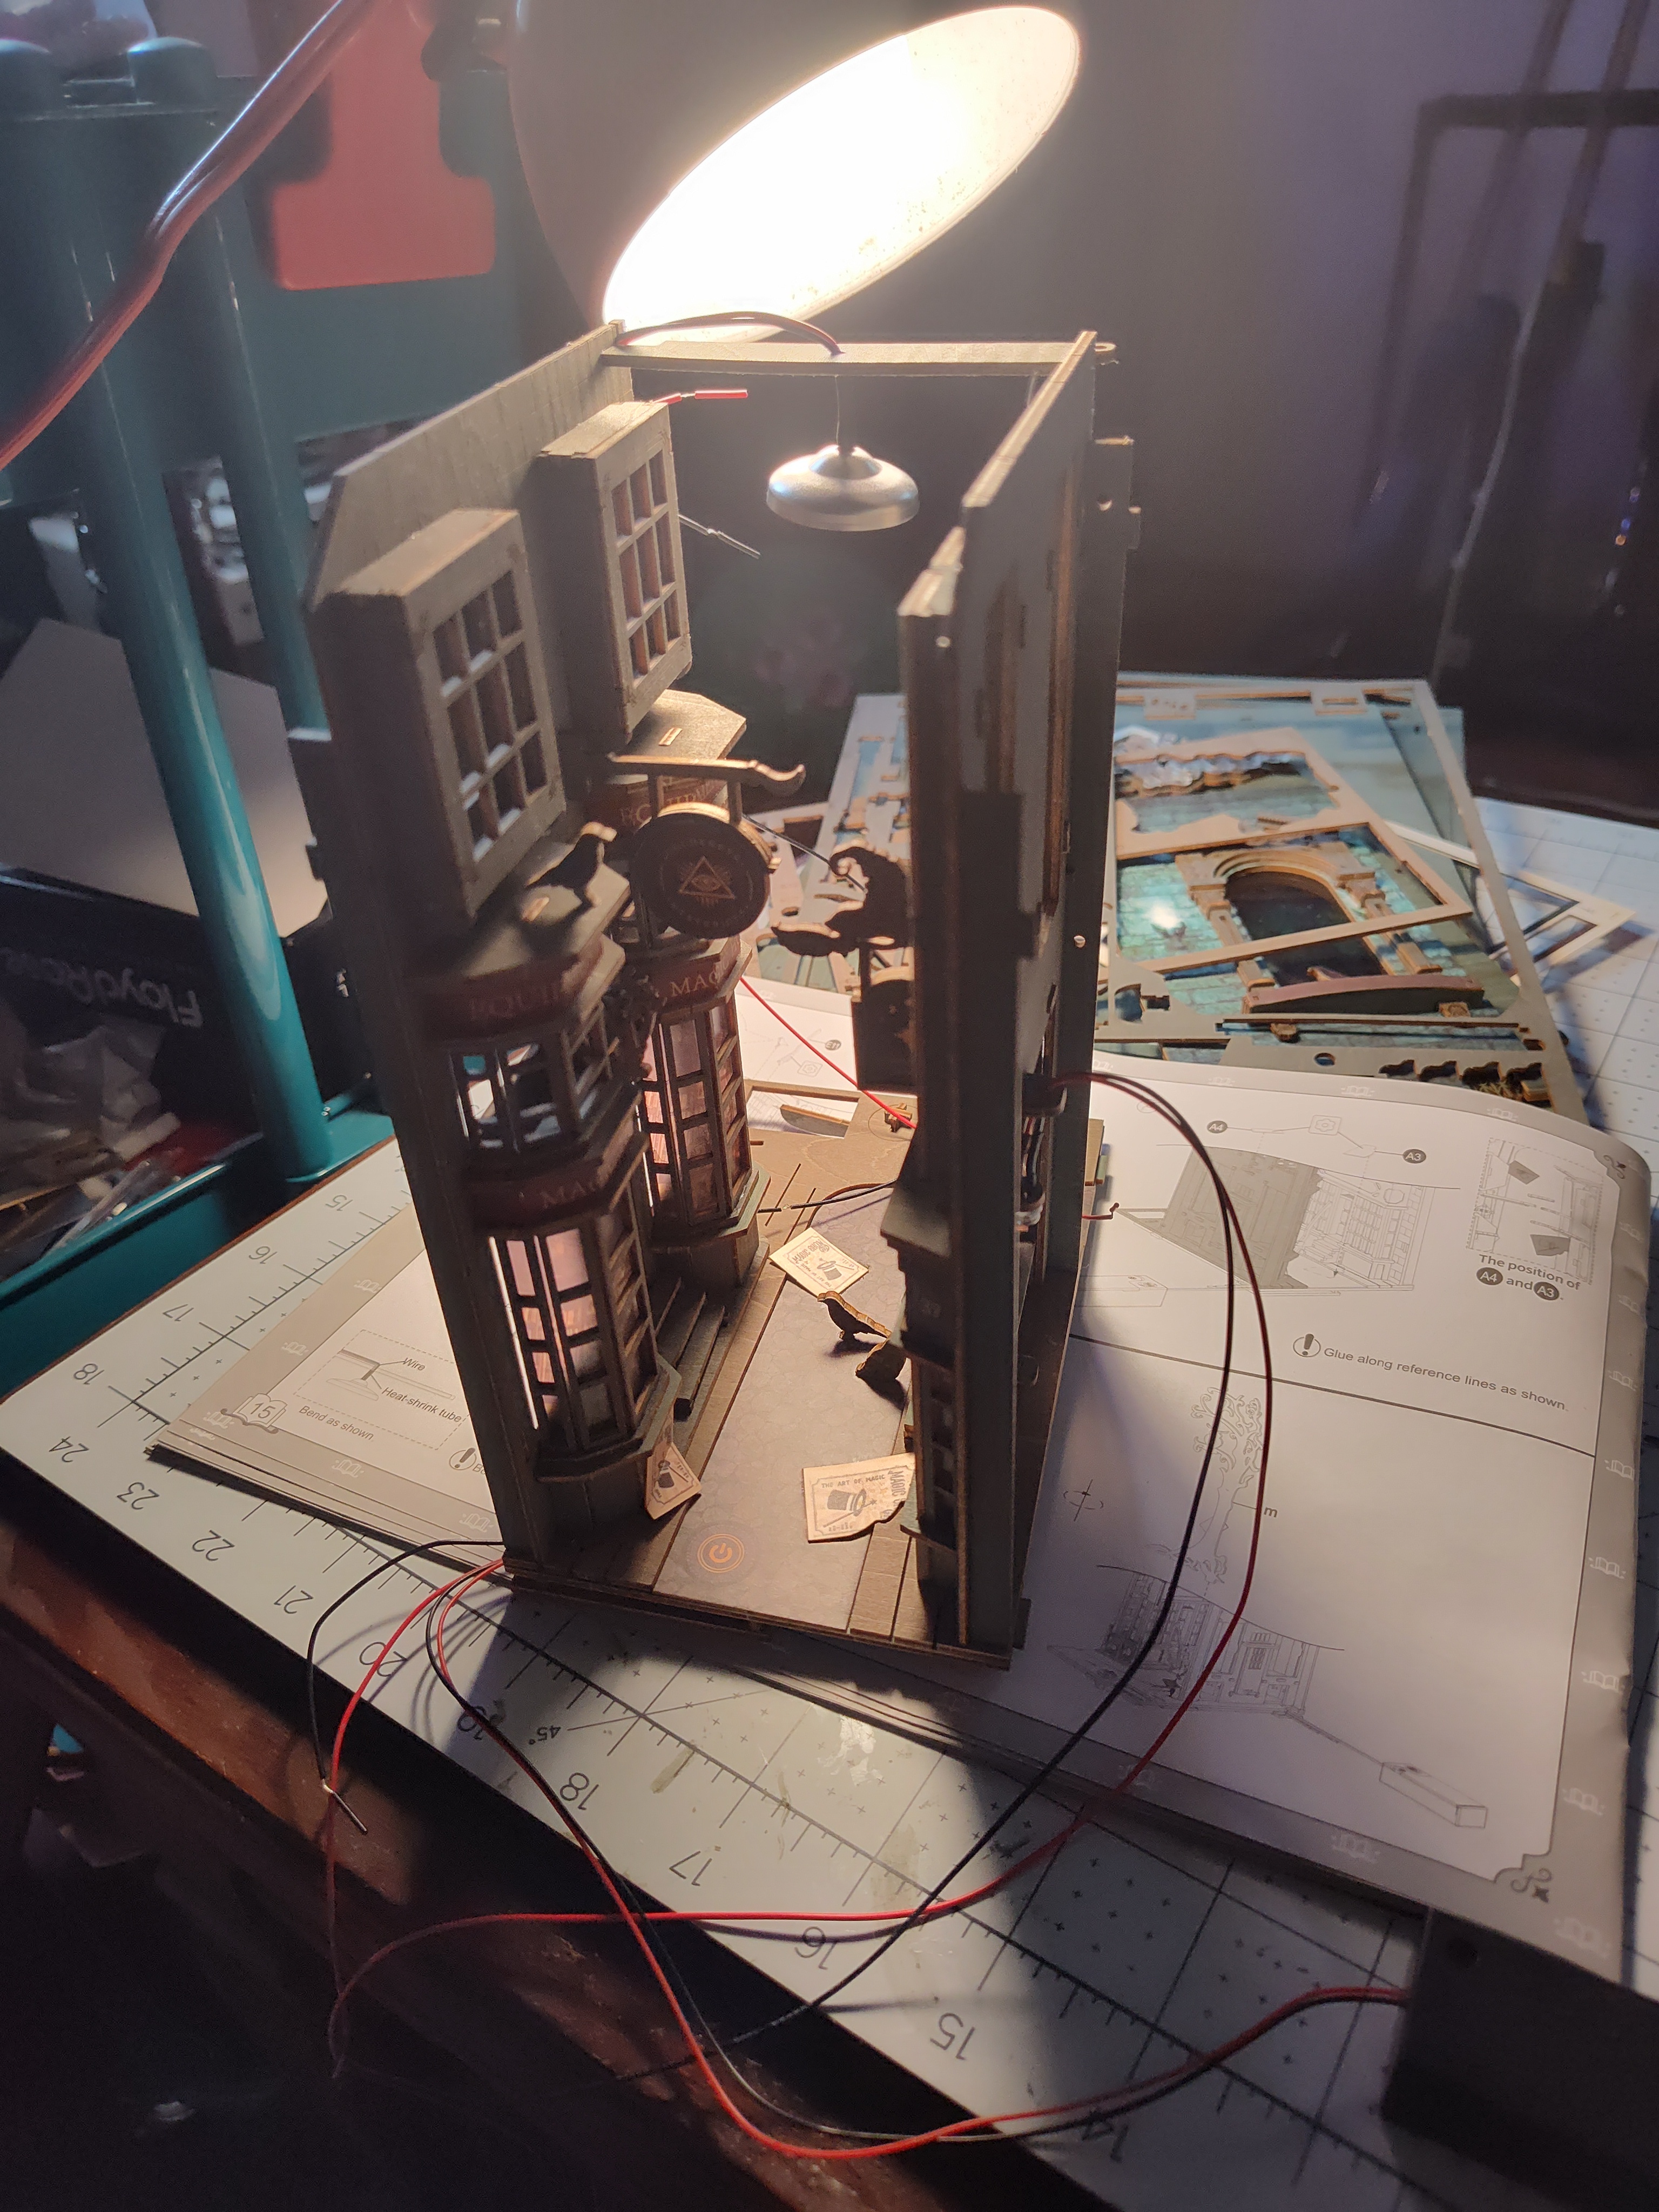
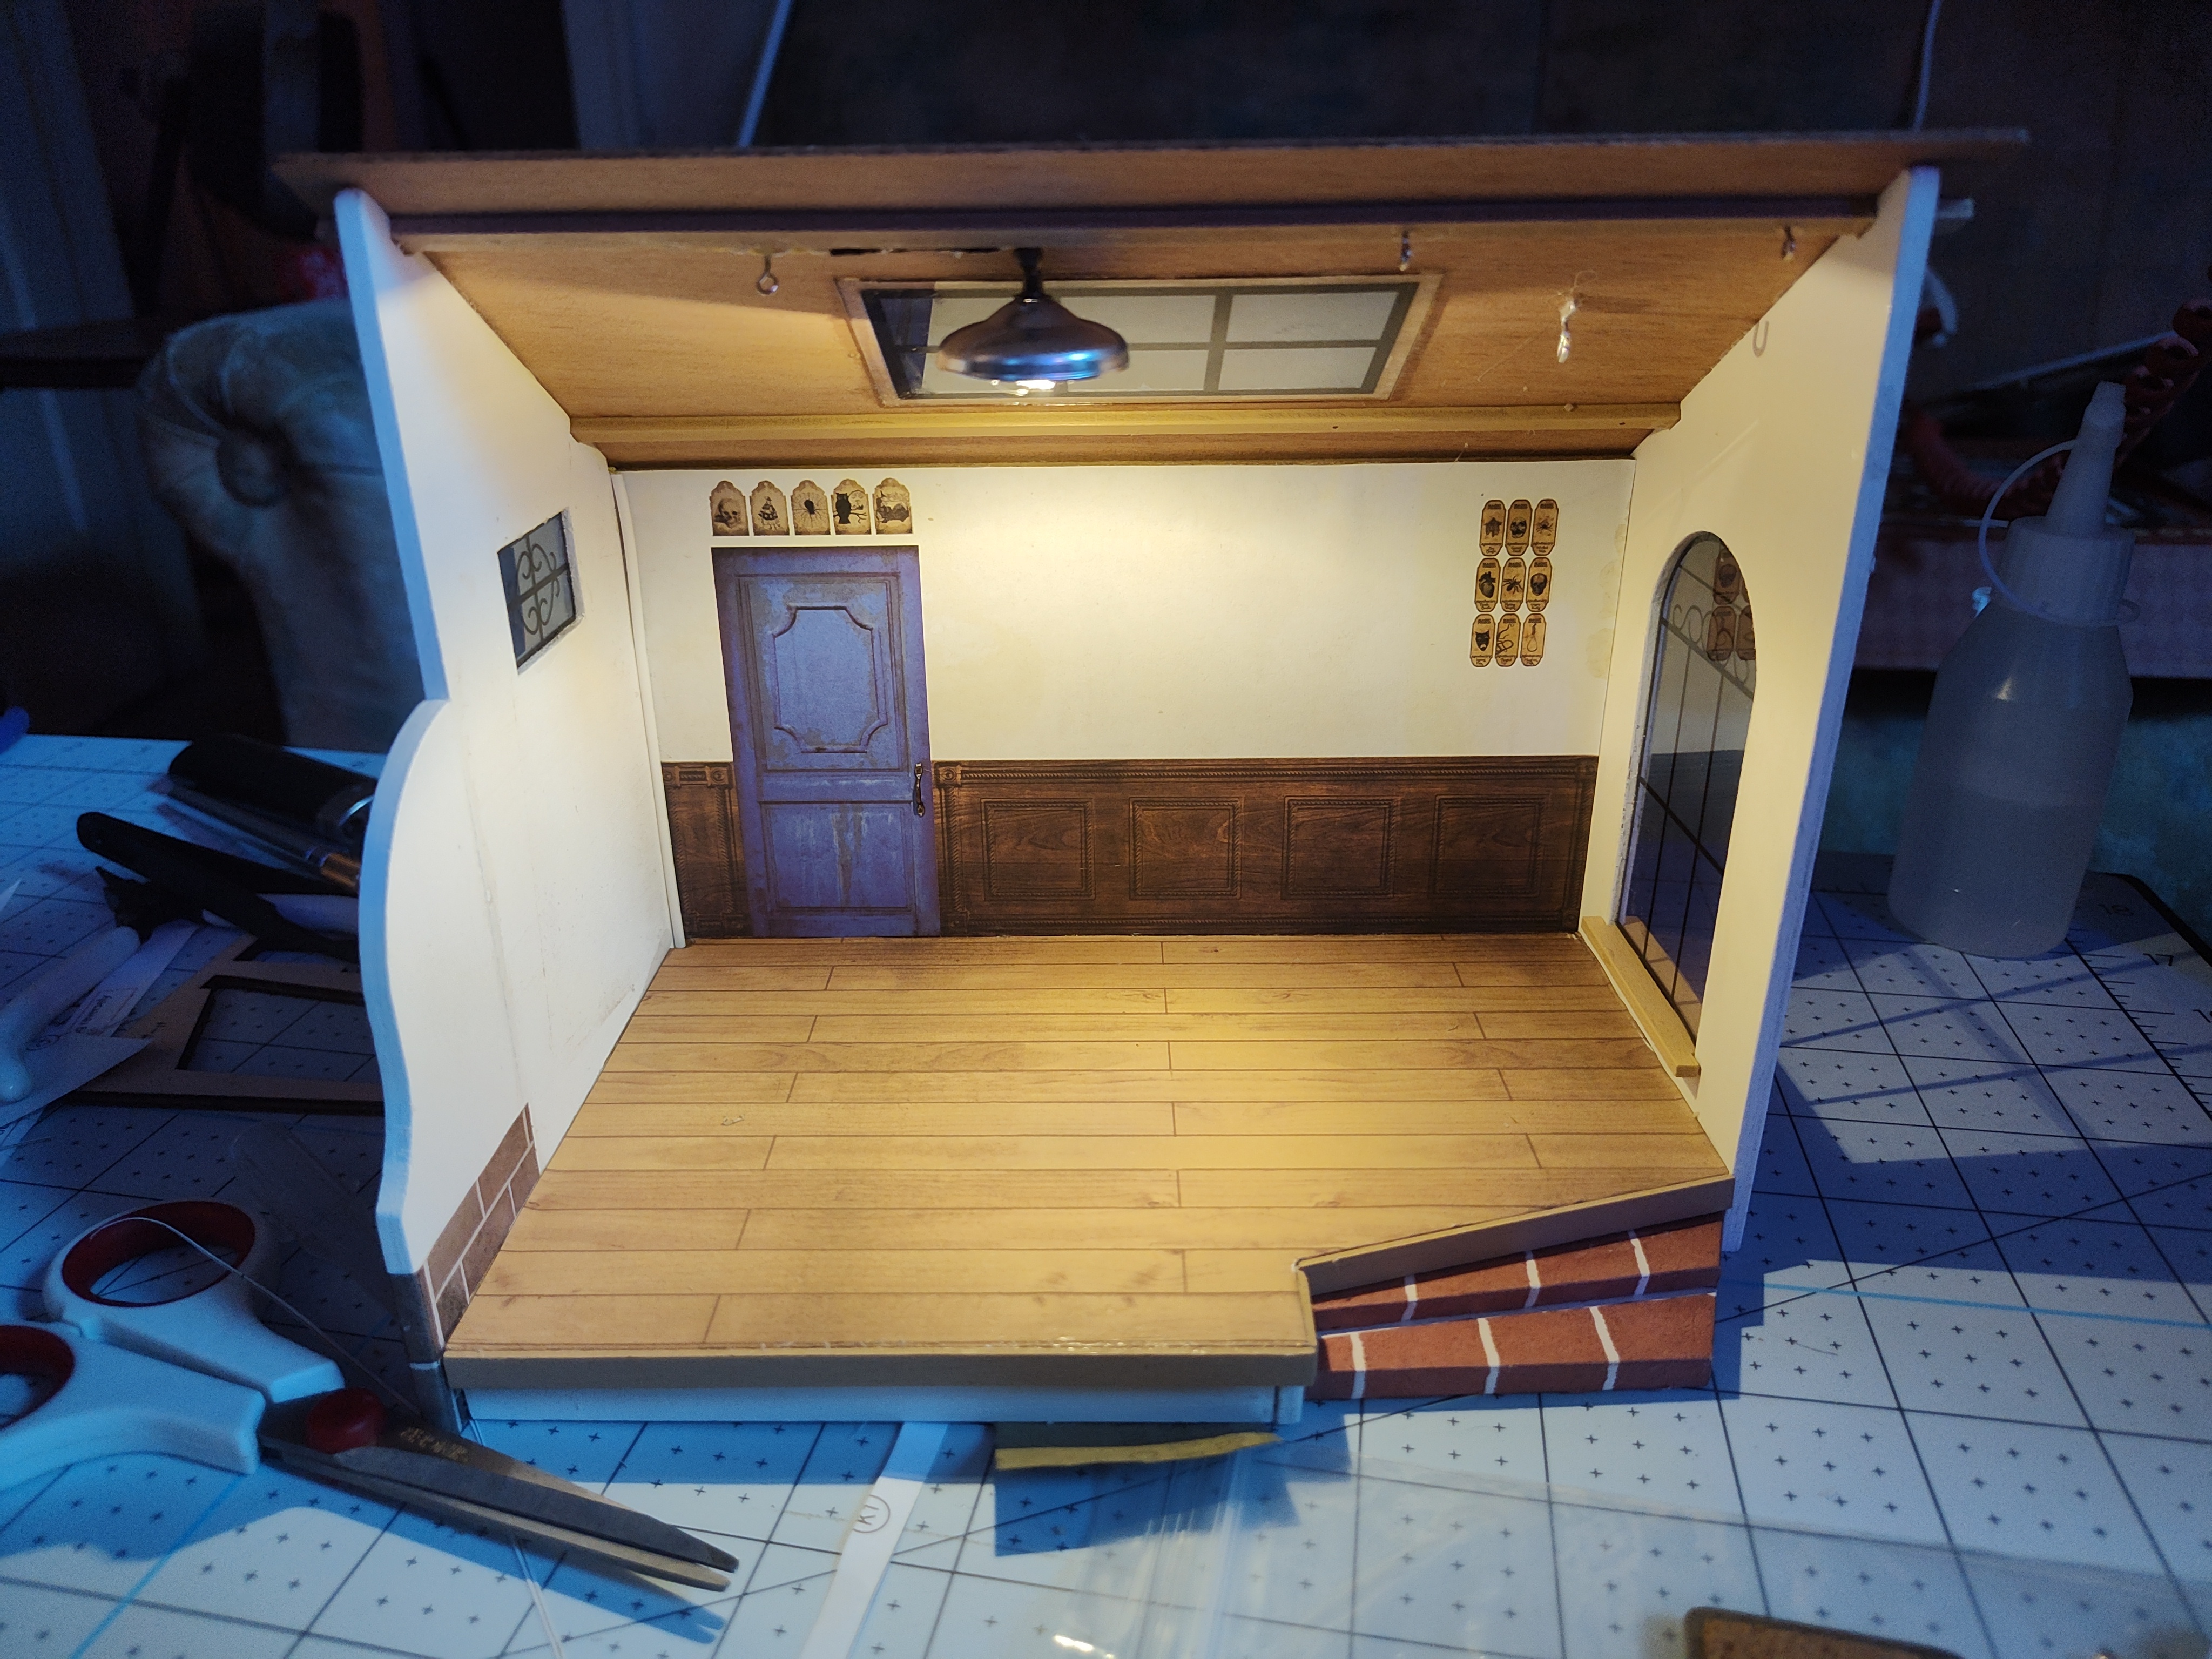
I've finished the building and the light works! Now I just have to arrange all the stuff in there!
There are so many tiny props in this thing lol! There are a few more smaller pieces to assemble and I'm working on the sign now, then I can start on the room where it all will come together!
This one is quite a bit more difficult than the last one, but SO much fun! I will have to do a lot of cleanup on some of these before I assemble the full finished model, but it's going great so far!
I added the little skull beads myself, they don't come in the kit 💀

I put the penny there for scale! Looking at it in closeup like this I can see a lot of mistakes I made, but that just means the next one will be even better!